How to convert any space into a drying room for cannabis
It can take years to perfect the art of growing, and an entire crop can go to waste right before your eyes if you don’t prepare properly for drying cannabis. We tend to believe that the hard work is done once we’re finally ready to harvest, but the truth of the matter is that if buds are left out on a counter, or in a jar or in a box that’s stashed away to dry, you could ruin the taste, smell and effects of the cannabis.
Curing cannabis plants properly is so much easier when it’s done in a room that is designed to complete the task, and it doesn’t have to be an entire bedroom to work. It could be an attic, an old storage room, or anywhere else where there’s enough room to comfortably spread out your weed, but it is best if it isn’t in a high traffic area. To help you get started with one of your own, we’re going to explain from start to finish how to convert any space into the perfect drying area.
Step 1 – Clear the room of any potential contaminants
This is perhaps one of the most important steps on this list, as possible contaminants could be toxic and leach bad tastes, smells, and chemicals into the drying cannabis buds. Though there are many things that can do this, some of the most common culprits are strong-smelling products like paint, stain, cleaners, poison, and mold. Problem items you can always be easily removed, but mold must be treated with the utmost care to ensure that it is gone long before you’re ready to start drying cannabis.
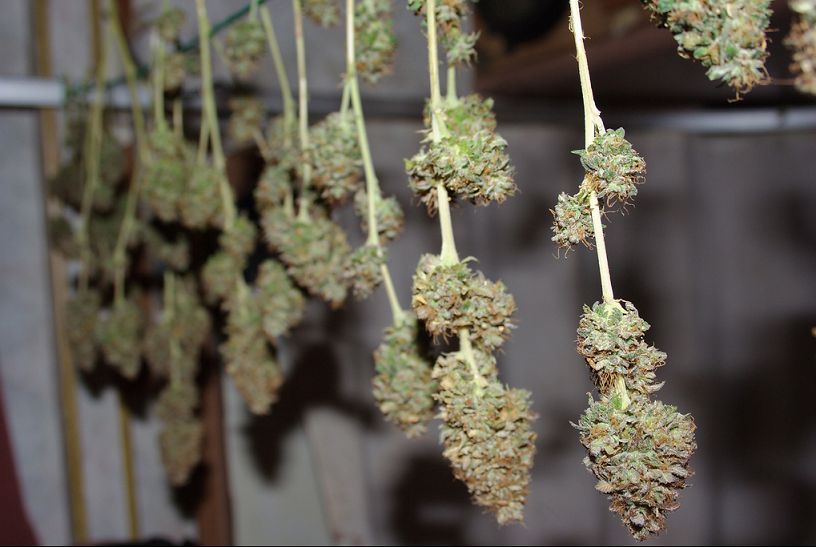
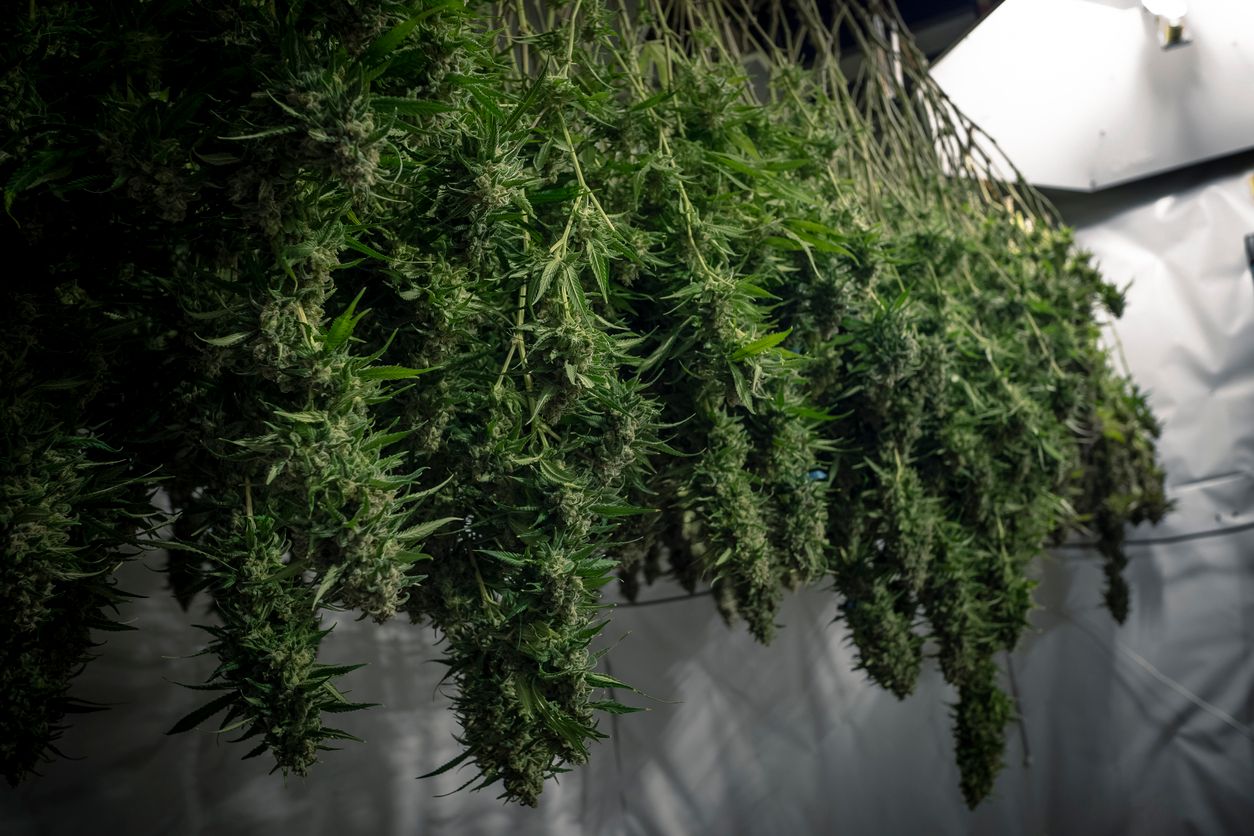
Step 2 – Install drying racks, or expand upon available bars
If you’re converting a closet into a drying room, then much of the work may already be done for you, as long as you’re comfortable with hanging cannabis to dry, and it doesn’t take much more than a few hangers to expand upon the available space in a few second. However, most professionals stress that flat drying racks offer a much better experience, as they can accommodate large amounts of flowers without interfering with the drying process.
Unfortunately, going this route usually requires consistent flipping to ensure an even drying of the plant materials, and since most spaces don’t come pre-equipped with shelves that are both stacked and made out of a breathable material, you’ll likely have to buy one and install it yourself. Luckily, this isn’t too difficult to do, as most hang from a single screw anchored into the ceiling, and it’s not expensive either since some versions sell for as little as $5.00 or $10.00.
Step 3 – Wash and dry the racks and walls
This is an essential step that works towards mold prevention and other things that you might not have noticed while following step one, and all you need to do it is some warm water, a clean cloth, and a few drops of dish soap. Ensure to wipe down all of the walls, hangers, bars, or anything else that’s inside, and then give it plenty of time to dry long before you fill it with cannabis.
Just make sure to steer clear of toxic cleaning agents and disinfectants. Otherwise, they could impact the results you get from drying by altering the taste and adding ingredients that just aren’t very good for your health. This is because they tend to linger for quite some time and leave behind a residue that will sit invisibly to the human eye, and they can be absorbed directly into the plant materials due to the level of moisture, which is bad news all around.
Step 4 – Check the temperature
If it’s too hot, it could dry out the cannabis buds far too quickly, and if it’s too cold, it could significantly reduce the rate at which the moisture leaves the plant materials, which could make the flowers take too long to dry and increase the risk of mold developing. So now is the perfect time to get out a digital thermometer to see what range the cannabis drying room normally falls in, and then you can make a plan from there.

The ideal temperature range that you should try to stick to is between 70°F - 80°F, and it is not uncommon for out of the way spaces in a home to plummet well below this. If you find that this is the case in your space, then you’ll need to consider installing a small temperature set space heater or turning up the heat in your home for the remainder of the process. On the other hand, if it’s too warm for proper drying, then a fan or two for air circulation can do wonders to bring it down.
Step 5 – Double-check the humidity
An excellent investment for any room that you’ll be drying cannabis in is a hygrometer, which is a tool that will help you to keep track of the humidity levels. Humidity works the opposite way as heat, where too much can prolong the drying process, and too little can speed it up in a way that is detrimental to the end product, so you’ll want to do your best to stay within a safe range as much as possible.
Luckily, most regions in the summer can easily maintain within a safe range of between 50%-65% humidity, but it is not uncommon to stray from that, particularly in the off-seasons where cooler temperatures outdoors are the norm. To keep on top of it is easy, but you will need a humidifier that doubles as a de-humidifier so that you can adjust the humidity within the room as it’s needed.
Step 6 – Seal up any light leaks
You’re now so close to the end but there is still one more thing to take care of and that is all points of access for light. Cannabinoids like THC and CBD, which you are trying to preserve throughout the curing process, will break down quite quickly under the intense rays of natural light, and even heavily unnaturally lit rooms can be damaging, so it is best to keep your space for drying cannabis as dark as possible.
This means sealing up the entire thing from every angle, so if it doesn’t currently have a door, then you’ll have to install one. If the door leaks light, then weather stripping can be a simple solution, and windows should also be covered from top to bottom. That can be done with brown paper, black plastic, wood, or anything else that will completely keep out as much light as possible.
The benefits
After reading all of this you might be concerned about the amount of work that can go into drying cannabis, but that is one of the best parts about designing a drying room just for this purpose, as you will only ever have to do all of this work once, and from that point on, it’s easy to use year after year with few to no adjustments aside from typical cleaning before use. All you have to do is follow these 6 steps for success, and you’ll be ready to finish your drying room like a pro in no time.