Cannabis Cultivation: A Guide to Growing Marijuana
Growing marijuana is a whole lot more complicated than most people realize, but once you get down the basics, the reward will be worth the investment. How to prepare for cannabis cultivation will depend on several different factors, but one of the most important first steps is choosing a location for a garden.
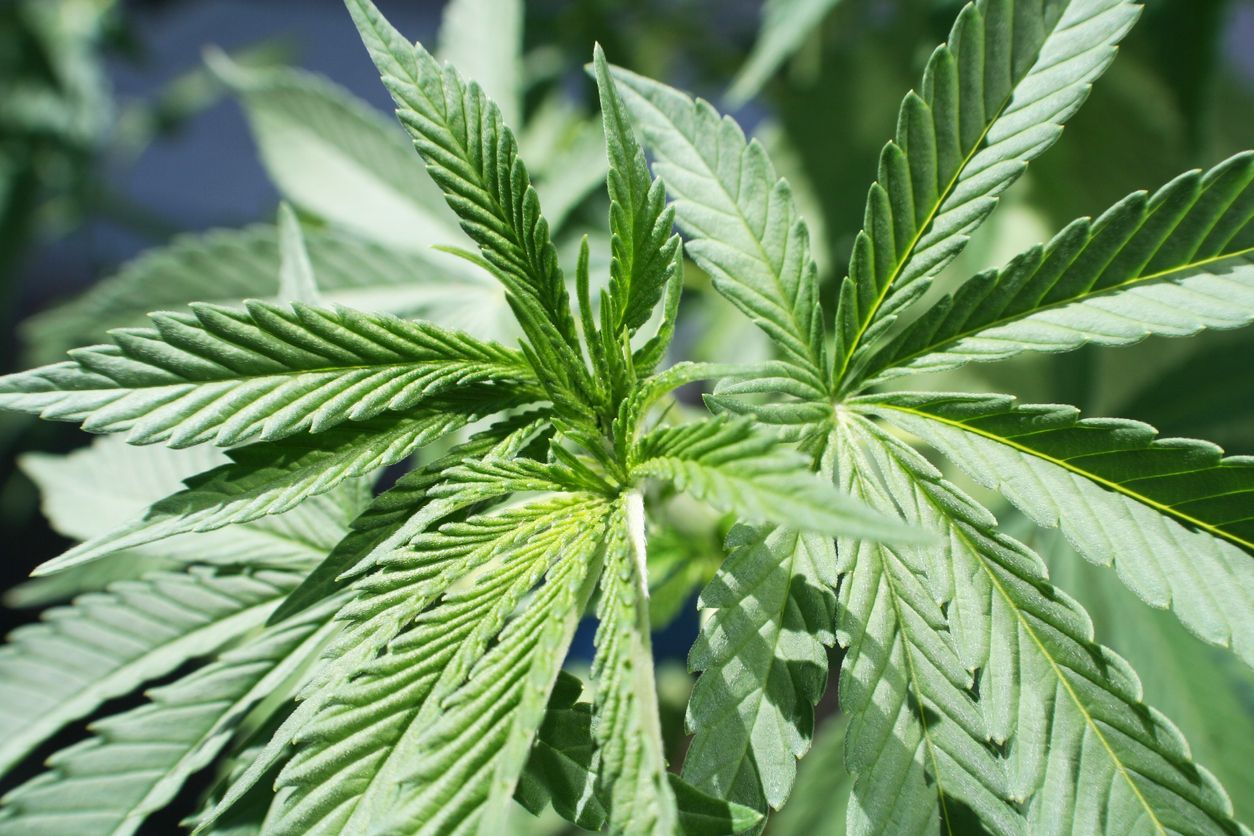
Growing indoors
Indoor cannabis cultivation can take several different forms, as some people like to throw one in a window like a house plant, but the most beneficial will be a fully decked outgrow room, grow tent, or grow cabinet that offers features like easy to control temperature, humidity, and watering. This can be one of the most expensive ways to grow a marijuana plant, but it is by far one of the best options out there.
Growing outdoors
Growing outdoors puts you at the mercy of mother nature risking rain, hail, and pests, but it is the most affordable way to start, and it’s also one of the easiest to maintain. All you really need is an outdoor garden, some water, and some cannabis seeds to cultivate a successful crop without all the fancy extras. Just remember to select a plot that gets full sunlight not covered by surrounding plant species.
Greenhouse growing
Growing cannabis in a greenhouse can offer all the same benefits as an indoor grow room including year-round function, temperature control, and higher than average moisture levels. The effects of the sun are amplified, and a marijuana plant can thrive quite well in this environment, but it often does require a good quality exhaust and heating system to maintain, especially in the colder months.
How seasons affect growing

The marijuana plant is a hardy species, that can’t be grown in the wrong season outdoors, which is why so many people utilize the assistance of a greenhouse or grow room as they allow cannabis cultivation all year-round. For those who want an outdoor garden, there are two major rules that you should abide by:
-
Do not plant your cannabis plants in the ground outdoors until the risk of frost has passed for the season. In most regions, this happens between the end of May and the beginning of June.
-
Your marijuana plant will do best if the daily high temperatures stay above 15°C, and the lows stay above 10°C, so even if the risk of frost has passed, it might be worth waiting a little while longer.
Best soil types
Ensure the soil you’ve purchased does not contain slow-release chemical nutrients. This could be troublesome to the plant by feeding them at the wrong time. Also, stay away from soil that has visible wood chips and soil that is not properly composted. Avoid thick and heavy mediums, as they tend to stunt the growth of the plant. A huge no-no is to use dirt from the backyard.
If you choose to plant outside, there is a lot of preparation involved. You need to know the composition of the soil and be prepared to assist it for optimum growth. Some heavy clay soils need a way to hold the oxygen and speed up the draining process. Prior to planting, mix compost and other decomposed organic matter into the earth. This will help the plant receive nutrients, drainage, and aeration.
Sandy soil is relatively easy to work with as it tends to drain well but does not hold the nutrients. Advice is to dig holes and fill them with compost to assist in binding the soil together. The ideal medium is silty soil, as this type of soil fills all the requirements for a healthy harvest. In concluding the best soil for growing weed is 5.5 to 6.5 range on the PH scale which will help in producing wonderful, healthy plants.
Optimal soils can be purchased at most garden centers and some hydroponic stores. If you are ambitious, you can make your own super soil. Some ingredients to use are peat moss, coco coir compost, worm castings, and aeration additive (possibly perlite) and don't forget organic meals like blood, fish, and feather are great, to name a few.
Fertilizer/nutrients

When searching for the best fertilizer for growing weed, there are more than a handful of options available to consider. Marijuana fertilizer comes in specialty formulas and pure mixtures that are distributed in different ways, and all come with both drawbacks and benefits depending on your setup, budget, and the availability of products you might have access to. Here we will cover how often to fertilize weed plants and how to use 6 different kinds that are most widely used today.
1. Pellets
Pellets are a convenient marijuana fertilizer and are preferred by beginner growers who are not quite confident enough for liquid fertilizers or are unable to access their plants frequently to use them properly. Pellets are condensed and hardened nutrients that are slowly fed to the plant throughout a 6 weeks period. Two of the most popular brands of pellets used on cannabis are Perlite and Vermiculite.
How to fertilize weed with pellets
If you are growing outdoors, then these pellets can be used much more freely. Outside you can place up to 3 of these around each plant. Indoors the soil area is much smaller, so precision becomes necessary. One pellet per plant every 6 weeks is recommended for indoor grow rooms where each plant have their own container.
2. Liquid nutrients
Liquid nutrients are the best fertilizer for growing weed. Though the process can require a few extra steps such as testing soil PH levels, it is the only kind of marijuana fertilizer that allows you to adjust certain vitamins according to your plant’s specific needs. Liquid plant food for cannabis can be used on both soil and hydroponic grow ops. Liquid nutrients for cannabis can be purchased either pre-mixed or in individual containers that each have separate nutrients like calcium or phosphorus.
How to fertilize weed with liquid nutrients:
This one is difficult to judge as the amount you require will depend on your setup and the schedule you want to follow. If you are growing in soil, then the liquid can and should be mixed into every jug of water you use to feed them. For more specific directions, check out our Liquid Nutrient Schedule list.
3. Composting
Composting is used by combining it between 30%-50% of compost to soil ratio. It will act as a slow-release formula that will feed your plants throughout their life without any need for additional fertilizer later. Marijuana-friendly compost isn't much different than regular composting, with the only difference being a focus on balance between greens and browns that are added to your compost pile. Greens are leaves, grass clipping, and anything plant-based, and browns are paper, woodchips, straw, or cardboard, bat guano, cow dung, and more.
How to fertilize weed with composting:
Ensure your compost pile is made up of 50% or less of green material. Once your compost is ready to be used, mix it with regular soil. A mixture containing one-part compost and two parts soil, or one-part compost and one-part soil, is ideal. Do not exceed 50% or you will risk burning your plants. Once the two have been mixed, it can be used in any pot to grow from. As you pour water over it, the nutrients will slowly be released into the dirt, which can then be absorbed through the plant’s root system.
4. Liquid fertilizer
Liquid fertilizer is a similar concept to liquid nutrients, with the most significant difference being that it is always a pre-mixed cocktail. While it may be effective, there is no way to adjust the amount of anyone nutrient your plants are receiving. Miracle Grow produces one of the most popular mixes labeled for tomatoes, however, can be used. When choosing a liquid fertilizer, be sure that it is meant to be used on food, as some made for flowers could ruin a bud’s taste and won’t provide it with what marijuana plants requires to thrive.
How to fertilize weed with liquid fertilizer:
Using liquid fertilizer to grow marijuana is one of the easiest as it only requires one measurement and can be added to your regular watering schedule. The liquid must be mixed into the water to dilute before it is used. Liquid fertilizer can be applied every 3 days or more and should never be poured directly onto the plant growth, or it may result in a burn.
5. Wood ashes
Wood ash is an amazing fertilizer because it contains a significant amount of potassium that can aid in the plant’s root system in establishing and contributing to the overall wellbeing of the plant. The biggest thing to watch out for when using wood ashes is any form of direct contact with the plant. While some skilled growers have had some success with sprinkling it on the dirt, it should be distributed through water and contact between the ash and the plant or it will result in a burn that can ultimately kill a plant.
How to fertilize weed with wood ashes:
Mix 1 cup of wood ashes for every cupid foot of soil you are preparing. A plant can then be planted directly into the mixture safely. As it is watered, the essential nutrients within the ash will be slowly released feeding the plant for up to 6 months after being planted.
6. Amino acids
Absorption of amino acid takes place through the roots and leaves of the cannabis plant. However, cannabis plants absorb amino acid faster through their leaves. Amino acids can help the cannabis plant during their growth and flowering stages. It is highly recommended that cannabis plants are fed with foliar amino acid fertilizer because it increases production and improves the carrying of nutrients around the plant.
How to use amino acids:
If you wish to use artificial amino acid, be sure to follow the instructions stipulated on the bottle of amino acid that you purchase. If you use too much amino acid, it may not be absorbed, and this would be a waste. Too many nutrients can also damage the cannabis plant.
How and why to perform a flushing
When fertilizer is added to a marijuana plant’s soil, it is absorbed into the plant, and much of it is also spread throughout the flowers, which are the portion that you’ll want to harvest to consume. Some all-natural fertilizers do not require a flushing period, but those that use highly concentrated forms of nutrients should always be put through 2 weeks where no additional fertilizer is added, and the watering schedule is amped up. If not, you could be smoking the chemical fertilizers when you use the product, which can cause sickness and will dramatically affect the taste and overall experience.
How to perform a flushing:
To flush your cannabis plants, you will want to begin at least 2 weeks before you are ready to harvest. Right now, you probably water your plants the recommended once a day. During the flushing period, you will need to water them as much as you usually would, only three separate times. What this does is it gives the plant the chance to utilize the remaining nutrients held within it, forcing it to draw any that are remaining in the buds to be consumed. If you want to be extra careful, then you can begin the process up to one full month before harvesting.
Best water for weed
Most who are inexperienced with cannabis cultivation might initially assume that it is safe to use any old water on their marijuana plant, but that isn’t true. Tap water is a culprit that can kill a plant from the inside out because it is full of harmful chemicals. That is why it is always best to use a distilled water, or rain that is naturally collected in a barrel outdoor.
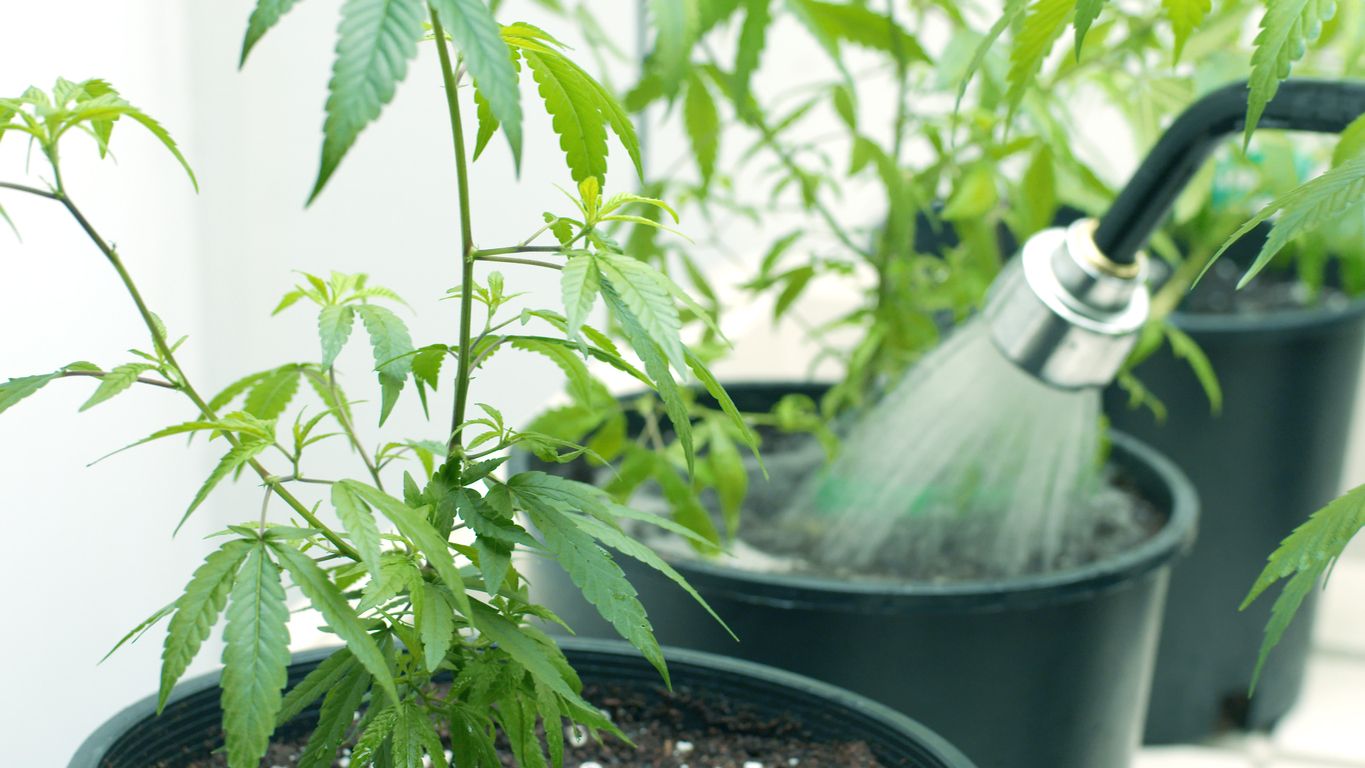
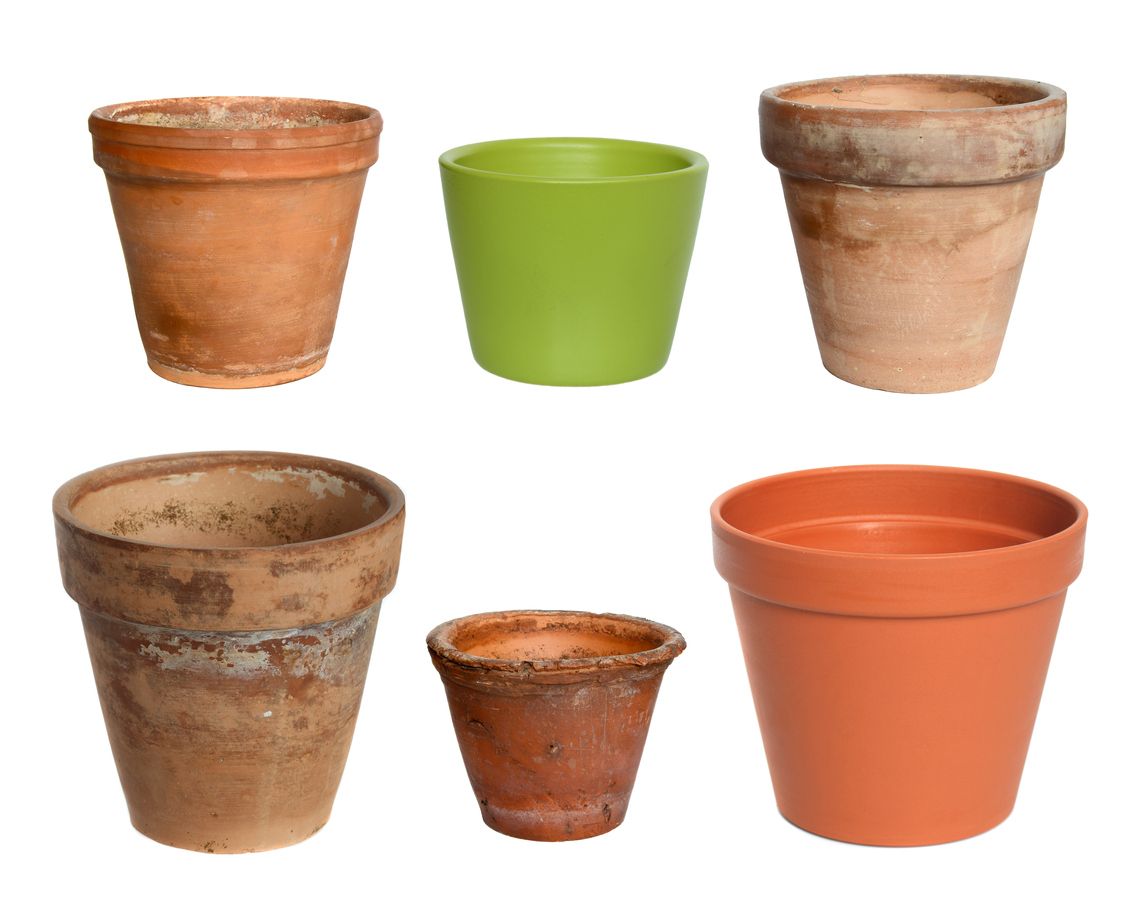
Marijuana pots
There are thousands of unique materials and kinds of pots on the market today, but these are some of the most commonly used choices for cannabis cultivation.
Plastic pots
These are often the cheapest option for cultivating cannabis, and they can generally be reused a few times. Plastic pots can be used on their own, but they can also be air pots or used inside of fabric containers.

Ceramic
These pots are typically not recommended for cultivating cannabis because they are more expensive, breakable, and don’t usually offer a sufficient drainage system for water, or depth for the root system.
Fabric containers
Fabric pots come in a few different varieties, and they are excellent for cultivating cannabis. They are nearly always larger and deeper than plastic alternatives, but they also come at a higher price. Some will hold up for years through multiple uses, while others can be planted directly into the soil to make transplanting your seedings easy.
Air pots
Air pots can be made out of plastic or fabric, and they are designed to work with aeroponics and hydroponics systems that require keeping your marijuana plant suspended in the air, rather than in soil.
Why the container you pick is important
You will need to look at the pot as the home of your marijuana plant, and much like a house, each individual is going to have a different set of needs, and in this case, that is most influenced by the kind of growth that you would like to try. Some plant pots only work as temporary holders, while others provide enough room and support to last until the marijuana plant reaches full maturity. Choosing the wrong plant pot can have catastrophic consequences, so it is important to pick the right one the first time around.
Choosing a good container
There are a few things that you need to look at before you can choose the right plant pot for cannabis cultivation including:
-
Size of space
The amount of room that you have to spare is important because pots can take up a whole lot of space, but you also need to be able to accommodate the room system, so you will need to choose a pot that will act as an answer to both problems. -
Length of stay
If you are cultivating cannabis in pots to transplant later, then you will manage just fine with much smaller containers, than someone who needs them to stay there until they mature. In the case of plants that are meant to be transplanted into an outdoor garden, then you might benefit most from one with a removable bottom that makes the whole process easier. -
Requirements of a grow set-up
If you are using a hydroponic setup, then you will need a potting system that will hold your plants into place and keep them suspended, but plants that will be grown in a room or outdoor garden can do well in almost any type of container, as long as it’s the right size. -
Pot size matters
For a marijuana plant to comfortably spread out in a pot for the entirety of its life, you will need a minimum 3-gallon pot size, but for those that are only temporarily housing seedlings, downsizing can save you space, money, and time. While you can often get away with skirting this requirement, it won’t do your marijuana plant any good to keep it all cramped up, so it is almost always best to choose the larger option that will suit all of your needs.
Why considering root development is important?
If you start with a pot or container that forces the cannabis plants root system to entangle itself and become root bound, then you are bound to run into issues down the road, and even if you don’t, your marijuana plant will not be able to reach its fullest potential in a restricted space. If the roots rub against the edges of the container, it can cause damage, and without ample room to stretch out, they will not be able to access enough nutrients to keep your marijuana plant at its finest.
Water catching and maintenance
Just like any other plant, offering up the ideal environment for a marijuana plant provides a boost like no other. The medium is the base of every growing cannabis plant, as it will draw the majority of its nutrients from underneath this source. Whether you are just learning how to grow weed or you are an experienced green thumb that is used to less technical jargon, then figuring out how to maintain the PH levels of your growing medium should be one of the first things put on your to-do list. Though some people will always believe that leaving nature to take its course might be better; Here we will cover some of the reasons this particular aspect of growing cannabis can be so influential on the quality of a crop.
What does PH mean?
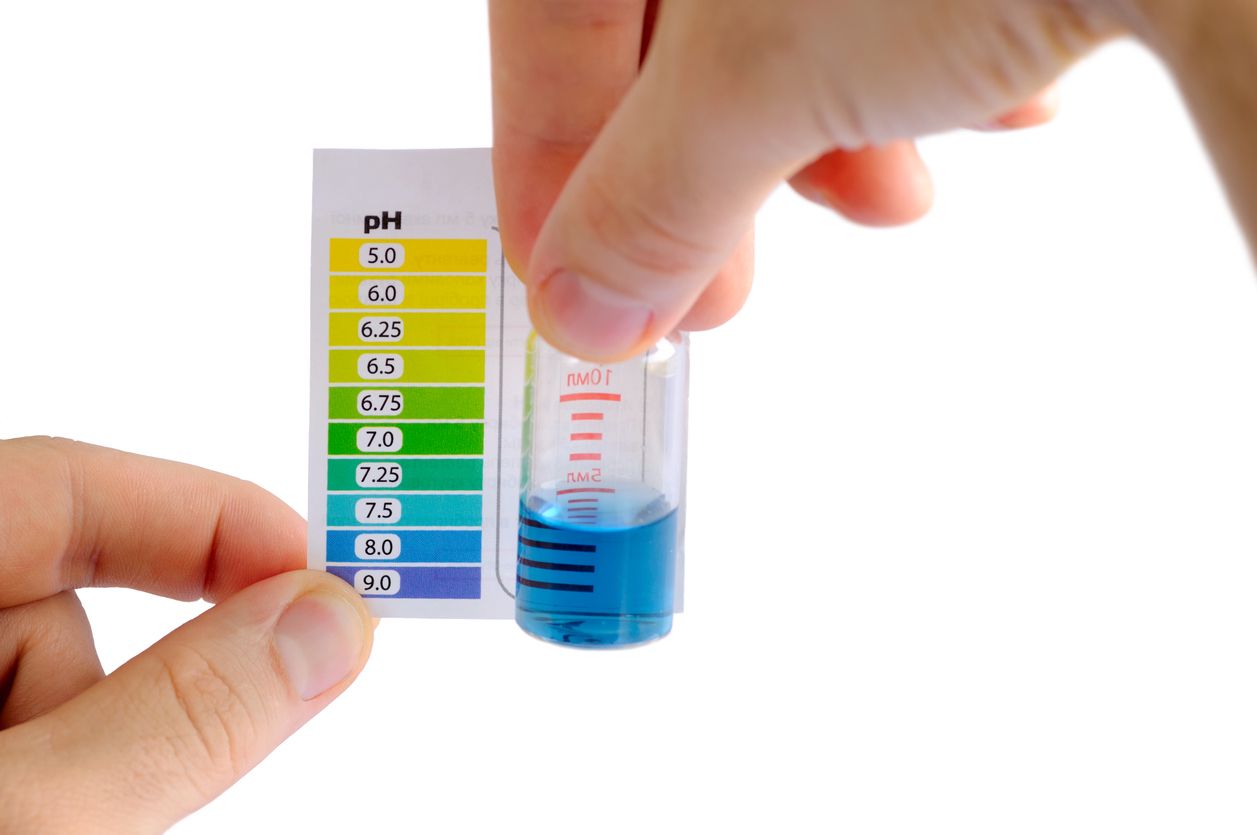
In this instance, PH means the precise amount of alkalinity or acidity of water-soluble elements. The scale that is used to measure PH ranges from 0 to 14, with higher numbers meaning an alkaline environment, and lower ones being acidic. Some species of plants enjoy high levels of either factor and this is often determined by the amounts that are found in their region of origin.
Are PH levels only relevant to those who are using hydroponics?
A lot of people assume that fancy testing kits and specific data are only necessary for more high-tech operations like hydroponics. These setups utilize water and other growing mediums that shift much more than your average soil. Though PH levels are much more critical with this method of growing, regular soil straight from the garden can have high or low reading and either positive or adverse results to show for it as well.
What is the ideal PH level for growing cannabis?
Cannabis plants are a hardy species that do quite well in an above average on the acidic scale environment. The recommended PH level for producing marijuana is between 6 and 6 1/2. If the alkalinity rises above 7.5, it can hinder the cannabis plant’s ability to consume essential nutrients like iron, zinc, and copper. If that number drops below 5, then it hits the fragile root system and stops it from being able to process other types of nutrients like magnesium and calcium. Reason being, with this type of acidic of an environment, they lose their water solubility.
How do PH levels influence cannabis plants’ growth?
The highest producing cannabis plants will most often be products of a stellar environment. As these plants grow, they must work hard their entire lives to gather vital elements like nutrients. Since the majority of these natural wonders are pulled from the growing medium, it is crucial that nothing stands in the way of that. The ideal environment results in the highest bud production, most potent due to increased amounts of THC and larger, more robust cannabis plants. All of which will ultimately provide a better-quality product.
How are PH levels generally managed when growing cannabis?
This is a difficult question, as so many different products and ingredients can be used to balance the delicate scales within the growing medium. However, in general, it is some form of supplement that is added to the water and given to your cannabis plants. This can help you to stay within a safe range, which will provide the best boost possible to your plant’s growth. Supplements are just that and only offered on a temporary and an as-needed basis. Testing for ph levels is typically done with a testing kit that can be purchased on Amazon or at your local dispensary and greenhouses/nurseries.
Step by step instructions for managing PH levels
If the growing medium is far too alkaline, then adding a natural compost to your water can help to return the standards to a safe range. To do this, you will need to test the water that will be used on the cannabis plants, as well as the runoff after it filters through the soil. A catch at the bottom of pots can help to keep this task smooth. At this point, it is also a good idea to harm yourself with nutrient PH level controllers, but if necessary, that can wait until when and/or if a problem ever arises.
Add all-natural fertilizers or nutrients to your cannabis plants with water.
-
Test the water and water runoff with a goal of around 6 on the scale. This won’t be able to alter immediately, but it gives an immediate idea of how healthy the plant’s environment is.
-
Use pure water to rinse the cannabis plants.
-
Test PH levels the same way as before
-
If the levels are in the ideal range, then continue with a regular watering schedule. If they are too low, then you will need to add a boosting supplement with the next watering. If they are too high, then wait one more day and test again. If it is still too high, then you will need to pick out an additive that will lower them and add it to your next watering.
Regulations on growing

The rules and regulations on growing vary from one region to the next, with some outlawing it completely, others having relatively lax laws for cannabis cultivation, so it is important to find out from your local municipality before you start, especially if you want to grow weed outdoors. In Canada, it is legal to have up to four plants at any given time per household, which is why so many growers choose feminized seeds to maximize space and stay well within the law.
How to make money on cultivation
In Canada, it is illegal to sell any cannabis-related product without a license. However, that doesn’t mean that you can’t make some money from a small grow op. The best way to make money from cannabis cultivation is to rent out a space and house a medical patients’ plants. It is also good to know that while you can’t sell your crop, is it perfectly legal to trade or gift cannabis and seeds to fellow Canadians, and a good exchange might be almost as beneficial as making bank.