The Best Growing Mediums for Cannabis
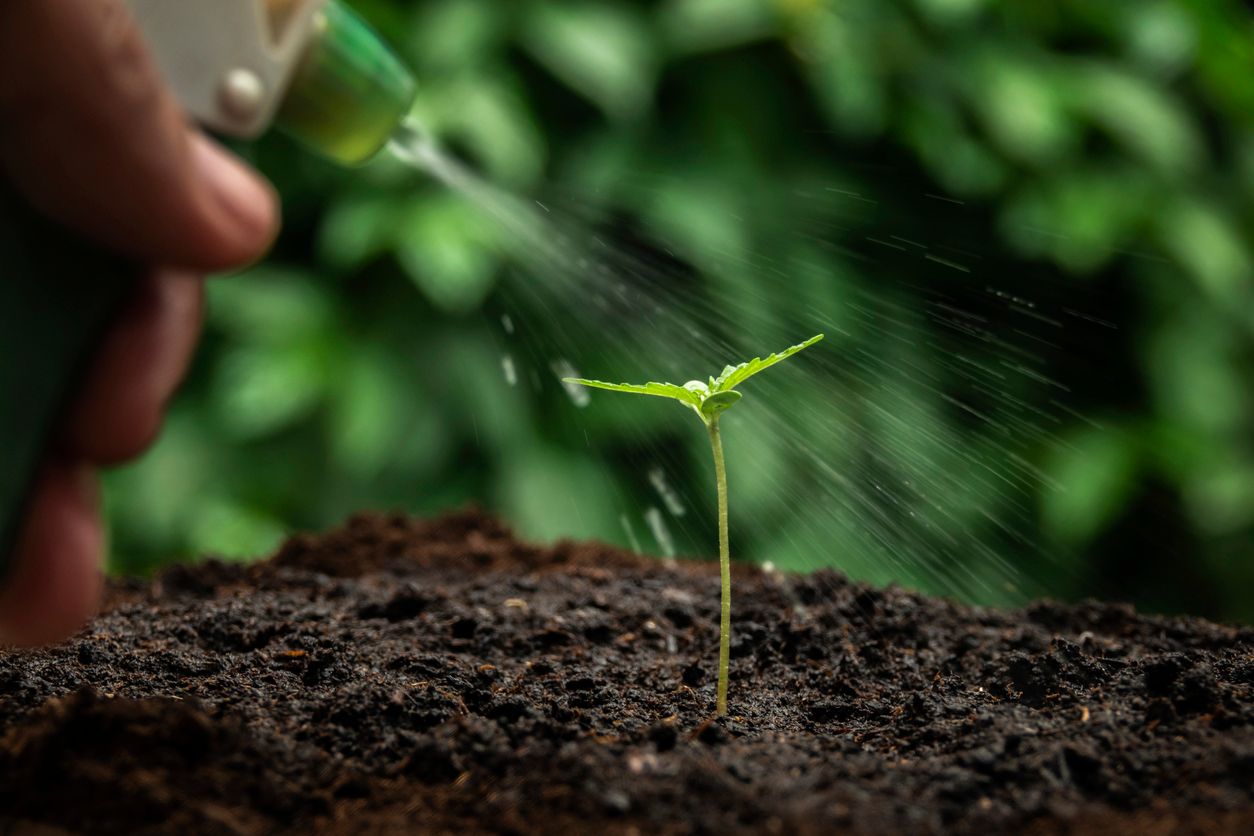
Many consumers believe that learning how to grow marijuana is an easy task, but what you use to support your plants can significantly impact the quality of the bud, size of yield, and more.
Though you may have success with growing cannabis in normal houseplant dirt, we now know that there are many unique techniques that can provide a boost with minimal effort. It is important to learn about all of them before settling on just one, as each offers a unique blend of positives and negatives that should be considered before starting.
Here, we will help by explaining the basics of cannabis growing mediums, including what they are, how they all work, the pros and cons, and of course, how to use them to harvest the best crop possible in nearly every situation.
What is a cannabis growing medium?
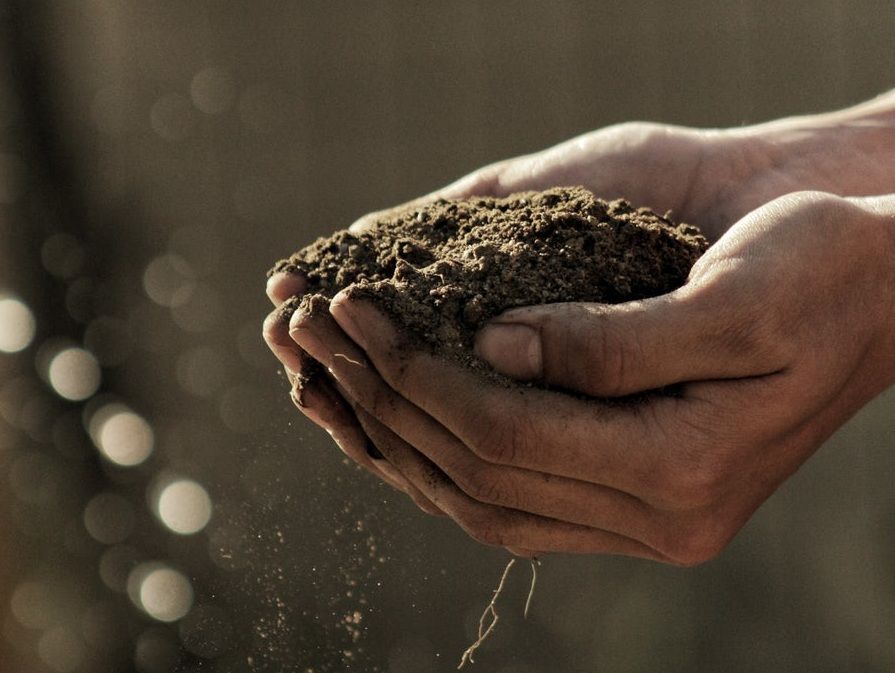
Growing mediums are the bases that we use as alternatives to regular soil.
Types of growing mediums
Hydroponic
Hydroponics grow systems require water as a base, but there is often another cannabis growing medium utilized to help to hold the roots into place, it just isn’t soil-based. This method allows for much more direct feeding of nutrients, but it isn’t all that easy for beginners to succeed with.
Biodynamic
A biodynamic cannabis growing medium is any living soil that is naturally maintained and fed through different techniques. Farms that utilize this technique maintain fertile land through composting, crop rotations, and animal excrement, but small-time growers can produce the same effect at home by using a living soil.
Coco coir
Coco Coir is a common additive found in products like doormats, floor mats, mattresses, and brushes, and it is commonly used as a growing medium for various plant species. It is also used as an environmentally, sustainable and completely organic substrate. Using this medium for growing marijuana will result in a hardier plant.
It is made from natural fibers that have been extracted and then processed from coconut husks. At one time, it was a less preferred medium, as the older versions wouldn’t last very long, but these days only high-quality Coco Coir is on the shelves, and it will last up to three times longer than its predecessor.
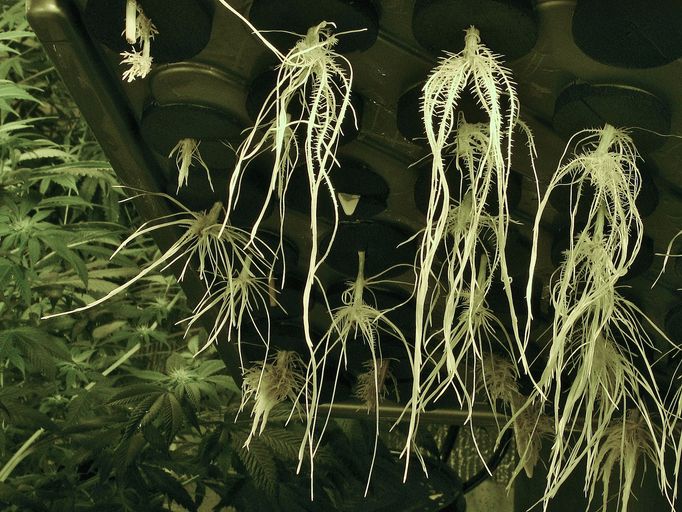
Aeroponics
Aeroponics is a technique that is used to cultivate plants that are suspended in the air with exposed roots that are consistently being misted with nutrient-rich water.
Pros and cons
Before you settle on a cannabis growing medium, it is important to weigh all the positives and negatives that may arise from each one, so that you know what to expect and can prepare accordingly.
1. Hydroponics
Benefits
- Direct feeding of nutrients through the plants’ root system
- No soils to maintain
- Fewer pests
- Faster plant growth
- Larger yields
- Less space required
- Easy climate control
- Water-saving
- Easier to adjust PH levels
Drawbacks
- Difficult for beginners to maintain
- Require constant supervision of PH levels
- Must have a continuous feed of water to avoid bacteria build-up
- May be damaging when used indoors
- Expensive to start and maintain
- Waterborne diseases are a risk
2. Biodynamic
Benefits
- Chemical-free
- Healthy
- Environmentally friendly
- brighter colors
- Faster growth
- Cost-effective
Drawbacks
- Most effective when used indoors
- Takes time and space
- Pests are drawn to organically grown crops
- Maintaining high nutrient levels using this method is challenging for beginners
3. Coco coir
Benefits
-
It is environmentally friendly and sustainable
This growing medium is taken from coconut shells, a product which is usually tossed away. It is an excellent alternative to soil and much easier on the environment. -
Reusable
Coco coir will not last for years, but it can stay intact long enough to get 2 or 3 successful harvests. -
Fast growth
The extra nutrients that are in this substrate can help with growing marijuana, as it includes many of the essential nutrients you would typically add. This doesn’t mean that you won’t have to feed your cannabis, it just helps to provide a solid base. -
Large yields
Since coco coir is capable of providing the ideal environment for growing marijuana plants, it results in much larger buds and more substantial yields overall. -
Space for the root system to flourish
The texture of coco coir allows for the ideal amount of oxygen exposure while offering plenty of room for the plant’s root system to spread out unimpeded. -
PH neutral
Coco coir will maintain a ph. level of between 5.2 and 6.8. This will fluctuate but is also simple to stabilize with other nutrients. -
Minimizes your risk of dealing with pests and other plant illness and disease
Coco coir offers antifungal properties which can help to protect your cannabis plants from diseases and pathogens that could otherwise be deadly.
Drawbacks
- Chemical treatments
Most coco coir is dried using a process that includes various chemicals, so it is critical to check the label to ensure that there are no toxins present that may harm your cannabis plants. - Salt content
Many coco coir mixtures are rinsed with saltwater for curing. So, it is essential to clean or check if it was already done by the manufacturers. - Locks out calcium iron and magnesium
Since coco coir has a high exchange rate, the substrate will release and hold onto the nutrients as needed, but calcium will often remain left behind. To counteract this effect, you will need to use nutrients that are made specifically for this process for a healthy yield.
4. Aeroponics
Benefits
- Takes up minimal space.
- It’s energy-efficient as both the irrigation system and portability lessen the amount of water and hydro needed to produce a healthy harvest.
- Less maintenance is required since the system is self-functioning and uses a growing medium that will help to regulate the PH levels.
- Over 90% of the materials needed in this aeroponics unit are reusable.
- Aeroponics speeds up the growth process and produces most substantial yields.
- These systems are entirely safe to use, and easy to fix.
- Since aeroponics applies constant exposure to oxygen via the roots, the plants can easily absorb more significant amounts while also staving off many of the diseases that cannabis plants so often succumb to.
- Useful both indoors and outdoors.
Drawbacks
- Challenging to design without assistance
- A lesser-known method which leads to less available resources to learn
- Without proper maintenance, these systems can get clogged and fail
- Leaking is a common complaint when aeroponics is used indoors
What is the best medium for growing cannabis?
There is no such thing as the best cannabis growing medium, as the right tool for the job means considering your financial, knowledge, and space constraints. The best one for beginners who are running on a tight budget is probably a biodynamic organic medium that won’t require too much upkeep to maintain, but for more experienced cultivators, hydroponics is often the preferred option.
What cannabis growing medium doesn't have bugs?
Water is the only growing medium that you will find that does not support the lifecycle of most pests, but in exchange for that advantage, your crops and you are exposed to waterborne parasites which can be even more deadly and difficult to eradicate.
How to grow a marijuana plant with coco coir
Coco coir can be used in place of regular soil, as well as for growing marijuana through hydroponics. However, to do so, you will need a small list of must-have items to maintain control over the ph. and nutrient levels being administered to your cannabis plants.
Tools/materials
- Perfect Sensi Coco Grow A&B (to help with blooming and maintain nutrients)
- Big Bud Coco (to increase bud size)
- Pots (2 gallon)
- Lights (either sunlight or artificial lighting)
The setting up process is as simple as you would typically for growing marijuana, followed by a stringent regimen of all the above nutrients according to the label directions. Though some people have luck cultivating without the addition of nutrients, if you want the best chances at success, it’s a good idea to make the investment.
How to use a biodynamic cannabis growing medium
Performing this method indoors would not be suitable, as organic gardening can introduce pests and mold to a house, and it is difficult to consistently maintain in a locked-in area. Instead, it’s best to do this outdoors by selecting an ideally placed garden plot and clearing it of any weeds or contaminating debris, then follow the steps below to get going:

Tools/materials
- 1 hay bale
- ½ cup of manure
- 4-6 cups of soil
- 1-2 cannabis seedlings
- Sharp knife
- Trowel
Instructions
-
Use a knife or some other cutting tool to remove the center of the hay bale without cutting all the way to the bottom. The goal should be to create a bowl that will contain the soil and plant roots with some breathing room to spare. Each bale can hold up to two marijuana plants.
-
Once you have removed the middle of the bale, it is time to get started on making the filling by mixing the manure and soil together before filling the bowl with it.
-
Now plant your seedlings as far from the outer edges as possible. By this point, the bale should be sitting wherever it will remain for the rest of the plant’s life.
-
Water your plants as they grow, and every few weeks make sure to add in another handful of manure by gently sprinkling it on top of the soil, away from the base of the stems.
-
Maintain this regimen until the plant is between 2 and 4 weeks away from harvesting. At that point, the additional manure is no longer needed and can now simply let nature run its course.
Using hydroponics to grow a marijuana plant
Hydroponics (using water as a growing medium for cannabis) is a complex process that can be performed using a multitude of different techniques and products to get the job done. Since it isn’t a simple few step process, instead of explaining it here, we’ve decided to dedicate an entire guide of how to grow marijuana with hydroponics that includes everything you will need to know for a successful harvest.
How to make an aeroponics system for growing marijuana
This DIY project is an inexpensive way to try aeroponics growing all year round. You will notice that there are very few length measurements, and that is for a good reason. Every tote will be slightly different than the next, so it’s essential to keep that in mind when picking up supplies. If you use a small tote that can only sustain four plants, you will need fewer parts, and if you select a larger version, 12 feet of pipe might not quite be enough. Always inspect the parts compatibility by eye before beginning to make cuts, as one short measurement can mean another trip to the local hardware store to finish.
Tools/Materials
- 1 large, durable rubber storage tote with lid
- 4-8 caged sleeves
- 4 360-degree sprayers
- 12 160-degree sprayers
- 1 drill
- 1 small pump with PVC exhaust that matches the pipe size
- 12 feet of PVC pipe that is a ½ inch in diameter
- 5 PVC corner joints
- 5 3-way PVC pipe splitters
- 1 4-inch circular drill bit
- 1 1-inch drill bit
- 1 foot of 1-inch diameter rubber tubing
- 1 rubber corner piece
Instructions
-
Begin by measuring out the number of plants your tote can support. There should be at least one square foot of lid per plant. Once you know how many you will be using, a large circular drill bit can be used to cut a hole in the cover for each plant sleeve to slide into.
-
Now remove the lid and set it aside entirely. It’s time to take an assessment of the measurements that are needed for the internal irrigation system that you are about to create using PVC pipes. Begin by measuring the length of the inside of the tote. The longest parts are here, so these will be the first cuts you want to make. Remember, it’s always better to cut longer rather than shorter, as you want the piping to sit in the indent at the top of the tote as snugly as possible.
-
Once you have made those cuts, then it is time to press all 4 of the corner pieces onto the freshly cut pipes. Press them together firmly since the glue will not be used and lay them lengthwise in front of you.
-
The internal pipes that will run the same way as the outer chamber are slightly trickier. Each one will need one 3-way splitter piece installed directly in the middle, while still measuring the same length as the first two pieces. This means you will need to cut 4 separate pipes that are held together in pairs by a splitter and measure the same as the solid pipes that were cut beforehand.
-
Finally, it’s time for the smallest and most significant number of cuts. This portion of the irrigation system will be made up of 3 separate pipes that are attached using 3-way splitters.
-
Once you have all the pieces cut to length, it is time to put them together and see how they fit inside of the tote. Once you are done, there should be one full outer ring of piping and two others that run lengthwise across the center of the tote. Press the system into the divot along the edge of the tote, and trim down any parts that need to be adjusted. Once you are confident in the fit of this portion of the irrigation system, move onto the next step.
-
Use a one-inch drill bit to make a drain hole towards the bottom of the plastic container. This way, if you ever have too much water, it will leave through a safe set up rather than lifting your plants out of the aeroponics system. Press the rubber corner into the hole and install the tubing by pressing it firmly into the corner hole.
-
Now you will need to install the final piece of pipe that will run directly downwards to the submerged pump. Do so by cutting two small pieces of tubing to a size that will hold in the final 3-way splitter that is pointed down.
-
Remove the irrigation piping to install the sprayers. Most sprayers that are found in grow stores require a 1/6 drill bit to fit snugly without leaking. The 4, 360 sprayers should be installed on the inner tubes, and the 12, 160 sprayers should be evenly spaced out around the outer piping.
-
Now you will need to measure the length of pipe that will be required to reach the pump spout from the last opening in the middle 3-way splitter. Once that’s cut and put into place, the whole thing can be put back together to ensure a proper fit before moving on.
-
Finally, a hole for the drill cord is necessary towards the top of the tote to keep it from being submerged. Use a 1-inch drill bit to make a small hole and feed the cord through it to plug it in.
Now it’s time to see if the system works! Add in approximately 10 gallons of water and plug in the pump. Lift the lid to inspect all the working pieces and make any adjustments necessary before moving onto the planting stage.
How to plant cannabis in your aeroponics system
This DIY marijuana grow system is very different from regular planting in soil and pots. Follow these step by step instructions that will guide you through the planting process:
Tools/Materials
- 10 gallons of water
- 4-8 marijuana seedlings started in rockwool cubes
- 4-8 neoprene sleeves
Instructions
-
Once you have finished building an aeroponics grow station, you will need to fill it with small cannabis plants. The seedlings should be started well in advance of making this system, and all of them must be grown in rockwool cubes or a similar growing compound. Dirt is not compatible with the cage sleeves that are used to suspend the plants in midair. Once you have seedlings or clones that are rooted in this medium, filling the tray is as simple as dropping one plant into each caged sleeve.
-
If you were to leave the seedlings just sitting, they would eventually get damaged from rubbing against the edges of the cups, so to avoid that, you must use neoprene sleeves that are cut to the size of your cups. Gently open the slit in the middle of the neoprene disk and guide the stem of the plant into the center holding hole.
-
Now finally you can add the water to the system and make sure it’s enough to properly function the sprayers. If not, add a bit more, and if it’s enough, then you can set the lid back on and get ready to watch the magic happen.
How to take care of an aeroponics system when in use
Though this grow box is relatively low maintenance, there are a few things you will need to do to keep the system running flawlessly. Follow these guidelines for the best chance at success.
Instructions
-
One of these set-ups will work for the length of an average growing season, but they should be thoroughly cleaned between crops to prevent mold and other bacteria from forming.
-
The aeroponics system will initially take an average of 10 gallons of water, but much of it will slowly evaporate over time. It is always a good idea to check the water levels of your grow station daily, to avoid a potentially fatal dry spell.
-
One of the best parts about using aeroponics for growing marijuana is that it makes for a direct and straightforward delivery method for nutrients and supplements that can provide an extra boost for your plants. Any hydroponics specific supplements that are meant for edible types of plants should be safe to use in this system. Just remember to perform proper flushing for at least 3-4 weeks before harvest.
-
The roots of the cannabis plants will always be well watered, but the tops that support the fruit will remain dry without a little bit of extra assistance. Keep a mister bottle on hand and give the plant stalks and leaves a fresh spritz once a day to keep the leaves healthy and well-nourished.