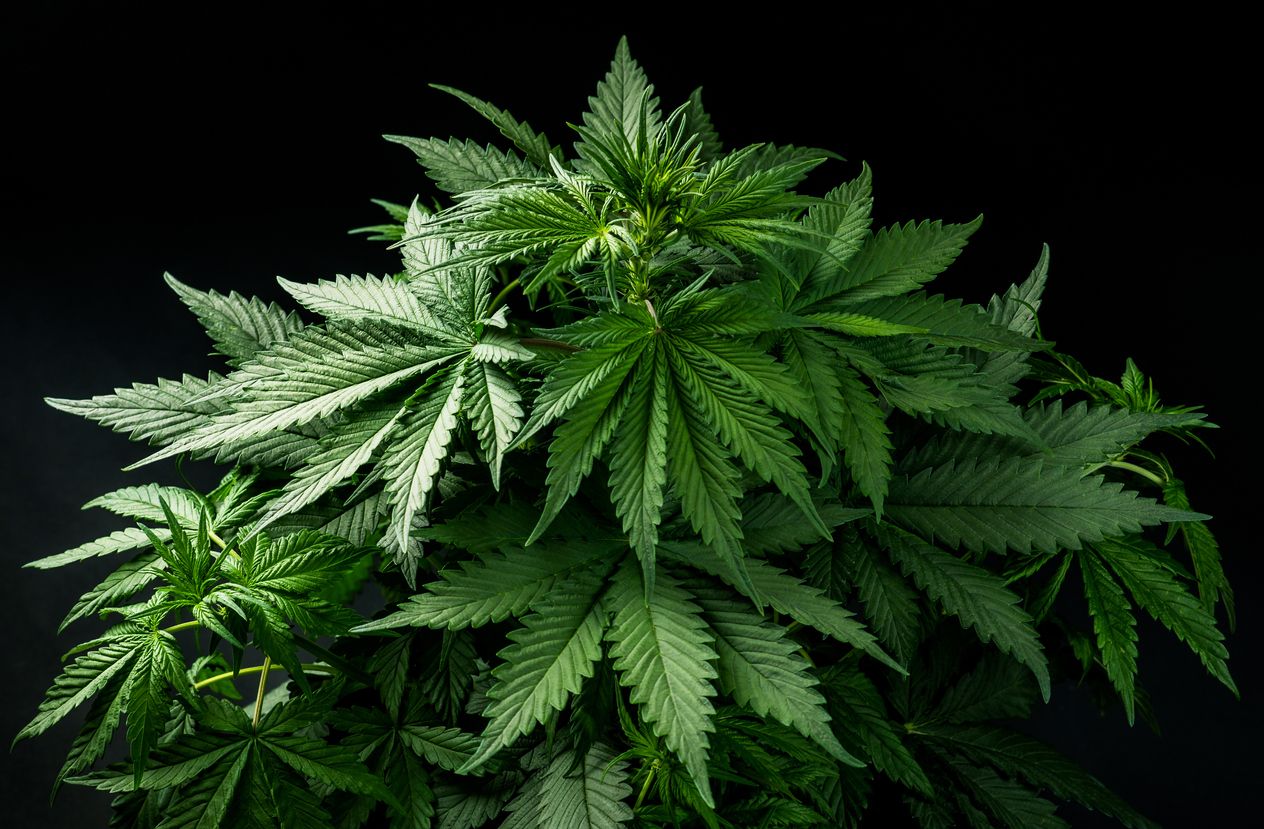
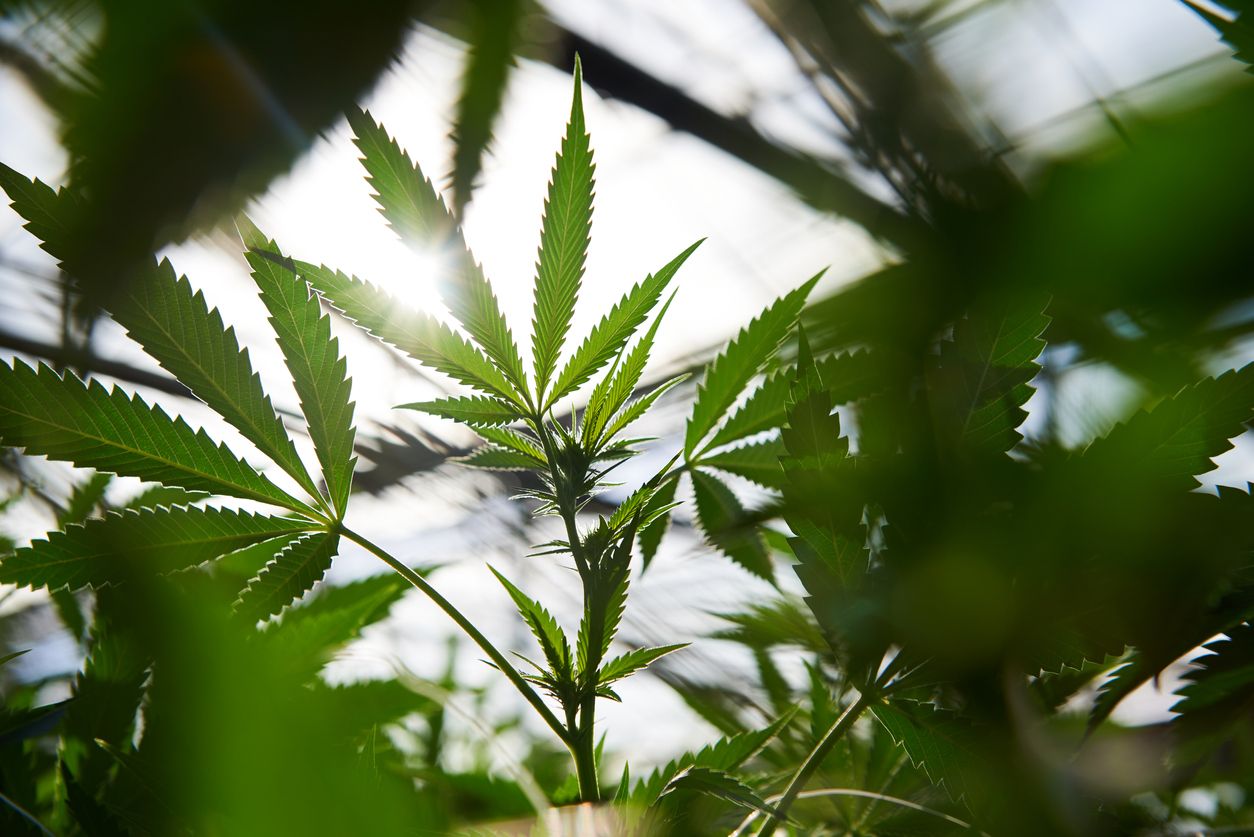
Troubleshooting for Marijuana Plant Problems
Growing can be an enriching and money-saving journey, but unfortunately, sometimes, marijuana plant problems can get in the way of a successful harvest. Luckily, knowing what to look for can save you a whole lot of trouble, as when it comes to damaging diseases, pests, and other common marijuana plant problems, prevention and quick action is key.
Cannabis plant nutrient deficiencies
Vitamins and minerals are two necessary nutrients for a healthy crop. A deficiency of any essential nutrient can pose a significant risk to your plant and even kill it if certain symptoms aren’t noticed in time. While there are numerous ways to treat a deficiency in cannabis plants, the best tactic to take is avoiding the chances of it happening beforehand rather than trying to do damage control after the fact, because by then harm will have already occurred. Here we will show you the best nutrients for weed that can be used to avoid some of the most common deficiencies growers are likely to experience.
What are the most common deficiencies in soil-grown cannabis?
- Iron
- Magnesium
- Calcium
- Phosphorus
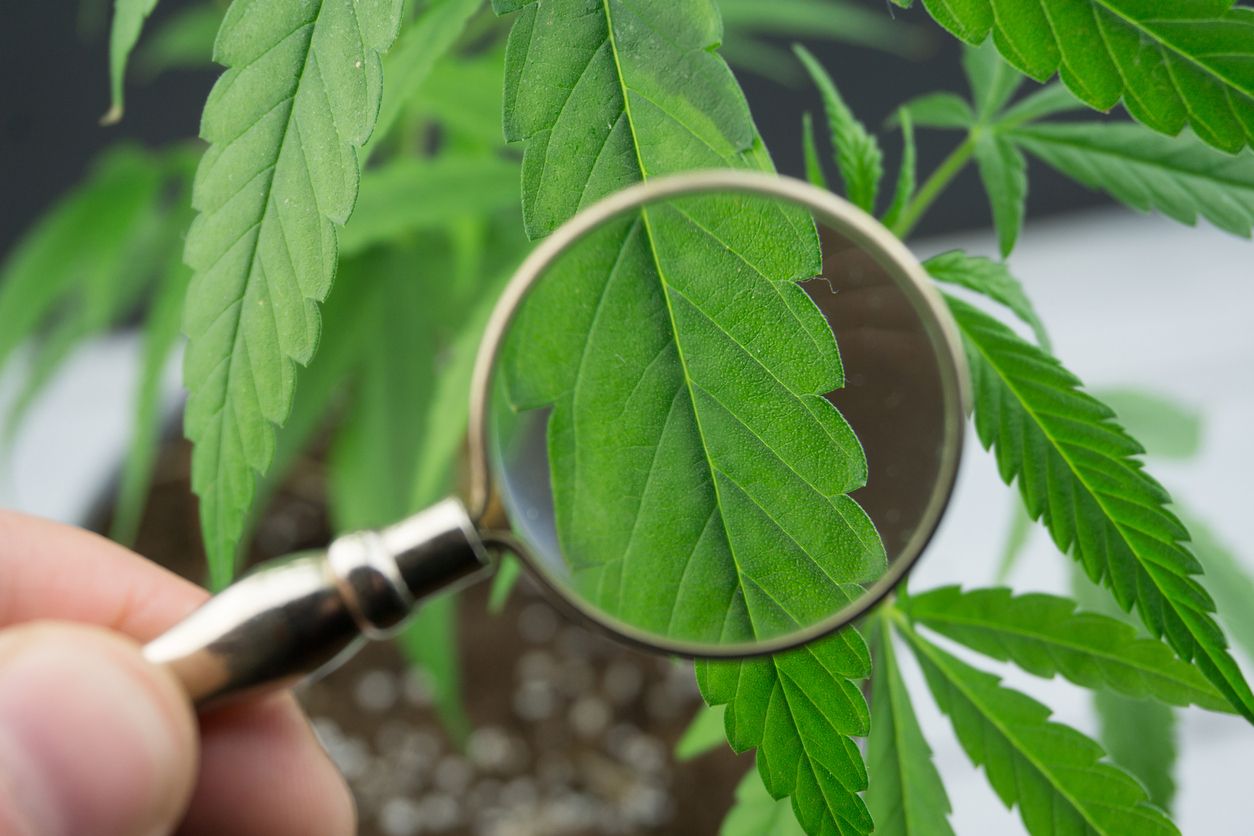
How to identify deficiencies and burns on my cannabis
1. Iron
Iron is one of the most necessary nutrients for weed, as it works directly with the enzyme production process. When the iron levels within a cannabis plant run low, it will affect both leaf respiration and the pigmentation of the leaves.
Iron deficiency weed symptoms
When there are iron deficiencies in a cannabis plant, the first symptom is usually a yellowing of the leaves that are located highest on the plant. If you find you have a higher than 7.0 PH value in the dirt then the culprit is the soil that is hindering the plant’s ability to absorb a sufficient amount of iron through its roots. The leaves will slowly turn yellow leaving behind bright green colored veins.
How to avoid an iron deficiency
When preparing the soil to grow marijuana, it is best to add a natural iron material such as granular or powdered chelated iron. There are other options like placing a small copper pipe in the pot or dirt next to a plant, but pieces of metal can be sharp and possibly damaging, so be careful if you choose that route.
2. Magnesium
Magnesium is one of the most utilized nutrients by cannabis throughout every stage of development, and it is needed in fairly substantial quantities. Magnesium works to encourage a plant’s ability to absorb nutrients from sunlight, which is then made into precious carbohydrates and sugars that the plant feasts on. Cannabis plants absorb 90% of their magnesium through the soil and can become deficient if the material it is grown in is insufficient. Sometimes the magnesium present may be enough but simply has yet to grow the necessary microbial life needed to convert it into a form the plant can absorb.
Magnesium deficiency weed symptoms
A soil PH of less than 5.0 can often be one of the first indicators of a problem arising. The symptoms of this deficiency will show themselves in the lower portions of the plant and on the oldest leaves.
How to avoid a magnesium deficiency
Two of the most commonly used soil amendments to avoid magnesium deficiency are lime and Epsom salts. You will only need a small amount of approximately 1 teaspoon of either, per 2-gallon pot. Both will slowly feed this essential cannabis nutrient to your plant and help to avoid a deficiency in the future.
3. Calcium
Calcium is what is called a primary cannabis nutrient because so much of it is required throughout every stage of growth. It helps to strengthen the cell walls of the plant's root system as it forms and stimulates the decomposition process of the soil around it, which in turn allows the plant much faster access to many other essential nutrients.
Calcium deficiency weed symptoms
Since a lack of calcium can affect the growth of the entire plant, one of the first visible symptoms is a dramatic slow in growth. Once a calcium deficiency gets too out of control, new growth will completely die off and turn yellow or brown.
How to avoid a calcium deficiency
Often, calcium deficiencies are caused by acidic soil. To avoid having to deal with a deficiency altogether, consider using gypsum or limestone. Both can be purchased in whole or granulated form making them easy to add to any home-made super soil recipe. Only ½ of a teaspoon of either one is needed to support a 2-gallon pot, and the fresh stream of nutrients will continue to flow for 6-8 months after.
4. Phosphorus
Phosphorus is a macro-nutrient since it is needed in large amounts to maintain the metabolism of a cannabis plant. Phosphates are delivered through the ground after they have been consumed by various life forms in the surrounding soil. This cannabis nutrient is most essential during germination, root establishment, cloning, and the flowering stages of life.
Phosphorus deficiency weed symptoms
When phosphorus is in short supply, a marijuana plant will force it into the newer and healthier leaves. At which point, the older portions of the plant will begin to turn yellow, which is a process called chlorosis. If this deficiency lasts too long, it will eventually make its way through all the leaves slowly killing the plant.
How to avoid a phosphorus deficiency
Phosphorus is one of the easiest and most natural nutrients to use to fertilize your plant, making this deficiency also relatively simple to avoid. High levels of phosphorus are contained within a healthy compost pile as long as you are adding the right things to it.
Bananas, eggshells, coffee grinds, and ash can all be used either combined or added directly to the soil in small amounts. If you want to add some to a pre-potted plant, a teaspoon of any of the above can be sprinkled in or place a slice of banana peel on top of the dirt, and your plant will receive a consistent flow of phosphorus for several months.
What different nutrient deficiencies look like in cannabis
- Holes or completely dead spots
- Crinkling or wrinkles
- Unusually yellow or brown spots on weed leaves
- Tiny brown spots
- Distorted or oddly formed new leaves
- Stunted plant growth
- Curled edges or tips on leaves
- Dead leaves which may appear yellow or brown
- Leaves may appear a darker green where spots are present
- Weak stems
- Hollow stems
- Wilting leaves
- Small unestablished root system
How to treat calcium magnesium deficiencies in cannabis
Calcium for weed is so essential that a deficiency can completely kill a plant in a relatively short window of time. Since it usually takes a plant suffering for a great deal of time before symptoms like brown spots on leaves are severe enough to raise concerns, it is essential you act fast once you realize what is going on, but first, there are two things you should know.
Plants grown in soil-Marijuana plants that are grown in soil do best with a 6.0 - 7.8 ph range, with calcium being absorbed the most efficiently at 6.2.
Hydroponics- Cannabis plants grown using hydroponics prefer an ideal range of 6.2 - 6.5 ph with calcium still being more effectively absorbed by the plant at 6.2.
Instructions
-
The first thing to do when faced with a calcium deficiency is to perform a complete flush of your system with clean water that contains an added amount of liquid calcium.
-
Choosing a supplement is a trial and error task. Though most of the time, it is safe to assume that if your plant is calcium deficient, it is also suffering from a lack of magnesium or iron as well. Pick a supplement that offers a broad range of additives to help your plant heal itself including any of the above-listed nutrients. Two of the most popular supplements on the market are Cal-Mag and Dolomite Lime with Cal-Mag being suitable for any grow method including hydro and Dolomite being strictly for those growing in soil.
-
Using the Nutrients
Cal-Mag
To use Botanicare Cal-Mag Plus, you will need to add 1 teaspoon or 5 milliliters per gallon of water. This supplement can be used daily until your soil reaches an optimal PH balance and restores your plant’s intake of calcium to one that is sufficient for growth.
Dolomite Lime
This multivitamin is used by adding it to the water before watering and is not meant to be applied directly to the soil. You will need 6 teaspoons of it for every single gallon of soil, and it takes around 30 teaspoons to make 5 gallons of nutrient-enriched water. This can be used to water your plants every other day. Be sure to keep checking the PH balance of your soil so you know when you have finished the treatment.
Calcium toxicity in cannabis
Marijuana plants enjoy more than average amounts of calcium exposure, so calcium toxicity in cannabis plants is incredibly rare. However, it can and does happen and will present itself in a similar fashion as a calcium deficiency. The only way you will be able to obtain calcium toxicity in marijuana is by overfeeding your crop nutrients in a condensed form. If you think you have a deficiency but have also been feeding high amounts of condensed nutrients, you may want to perform a flush on your plant before attempting to solve the problem with more calcium, which could potentially make things worse.
Cannabis pests
What are all these bugs on my pot plants? Weed bugs come in all different shapes, sizes, and colors. If you are struggling to diagnose a weed bug, then you have come to the right place. Here we will cover some of the most common cannabis pests and exactly how to treat them.
Why you should keep an eye out for pests
Every grower who wants to avoid marijuana plant problems should stay on the lookout for these irritating creatures because it isn’t just their presence that can be an issue. Pests can cause severe levels of damage that are impossible to heal from, and in some cases, they can even kill your cannabis plant. Catching the problem early is necessary for early treatment and is the best possible chance for recovery.
Signs to watch out for
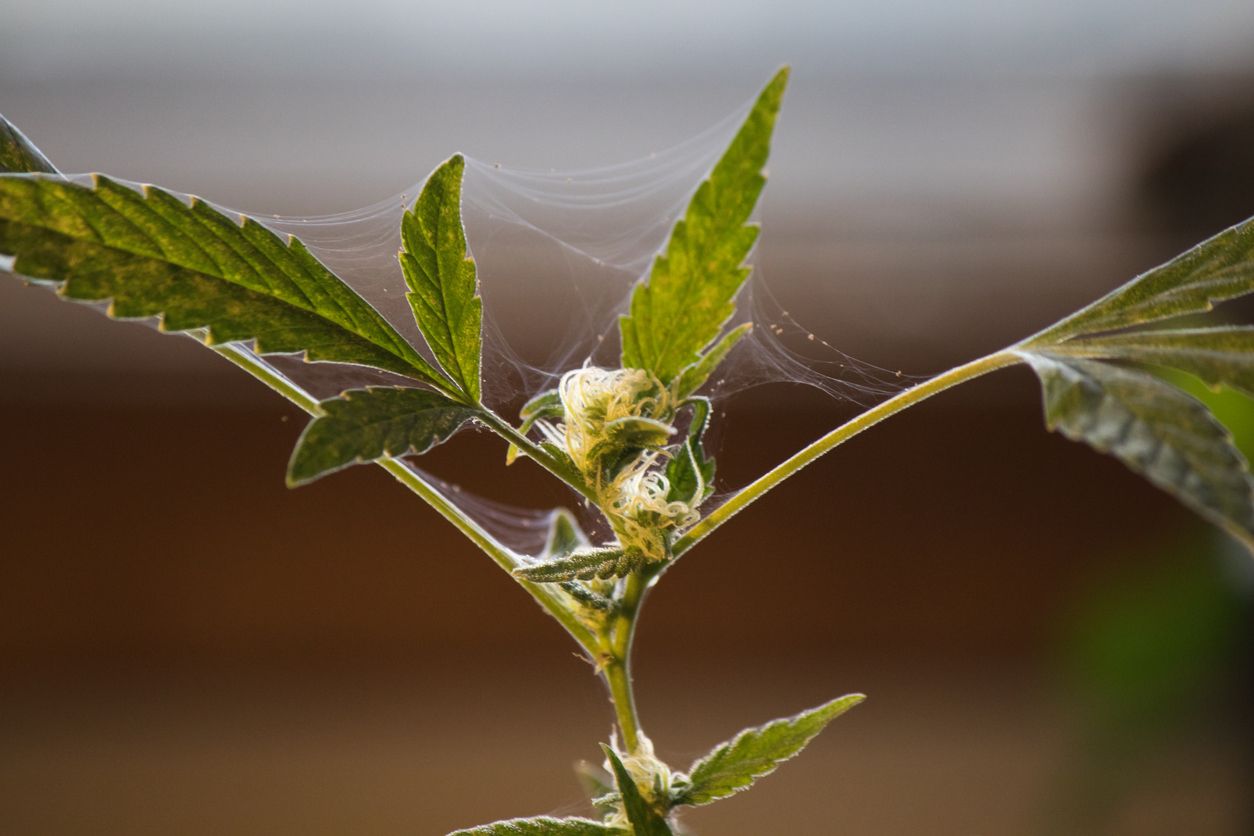
If you notice droopy leaves, holes, unexplainable lines or designs within the leaves or white webs that look like they have come from a spider, then chances are pretty good that you are dealing with marijuana plant problems that are caused by pests.
Types of pests
- Aphids
- Greenflies
- Blackflies
- Barnacles
- Broad mites
- Russet mites
- Fungus Gnats
- Leaf miners
- Mealybugs
- Spider mites
- Thrips
Prevention & treatment
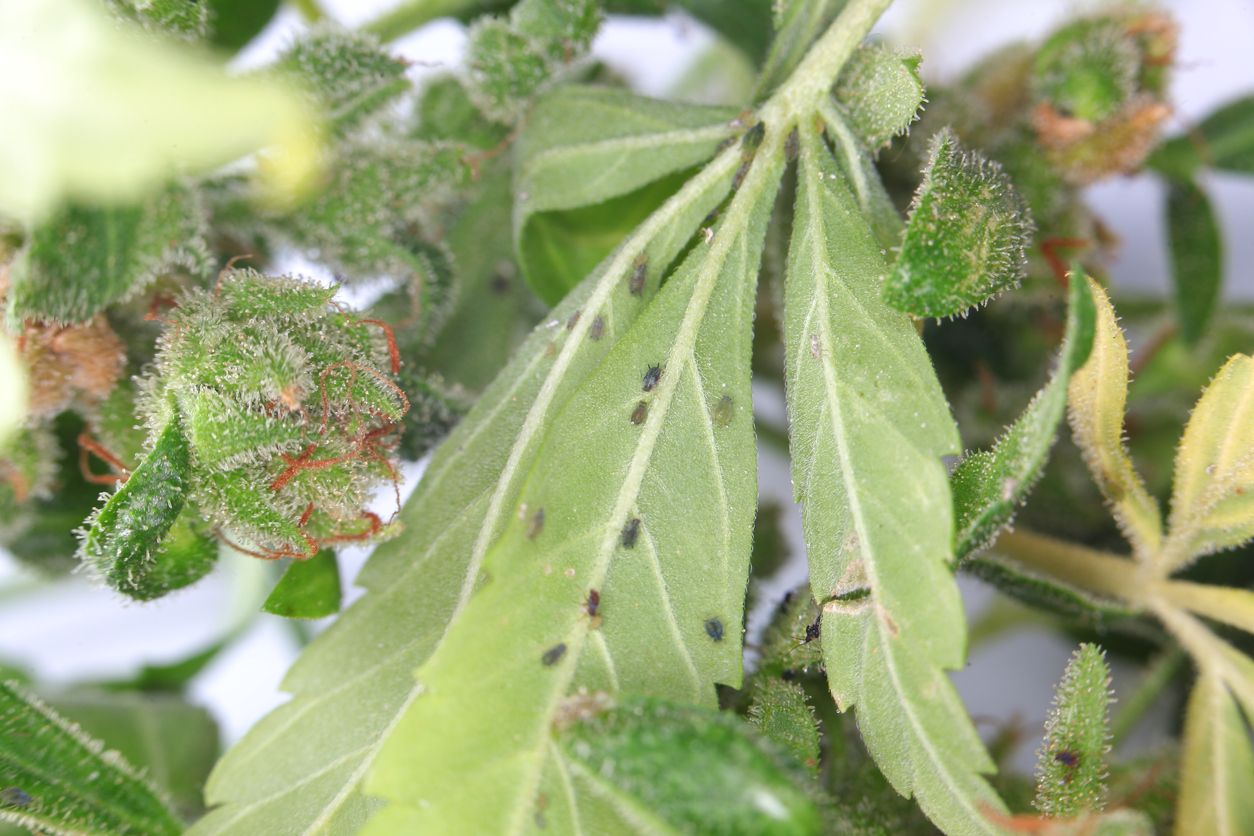
Aphids/ Greenflies/ Blackflies
An aphid, greenfly or blackfly is a soft-shelled bug that can be either white, green, black, brown, yellow, or red but most commonly is described as little black bugs on a weed plant. These are some of the most widespread cannabis pests in the world since different kinds can be found in almost every region. They are tiny, oval-shaped, and practically always have wings. These guys will hang out underneath your cannabis plant’s leaves, where they will attach and feed on the plant. The most common cause of one of these infestations is an adult bug laying eggs which can often go unseen and unnoticed.
Treatment: The best treatment, in this case, is prevention. While that may not sound great to those who are already struggling with what to do with these little black bugs on a weed plant, routine inspections can help make actual treatment more effective. Prevent these insects from moving in by keeping your plants moist by misting several times a day. If you already have them, your best bet will be to wash the entire plant using a gentle room temperature water and gently removing the webs and bunches of insects by hand. The next option is insecticidal soap that contains high levels of fatty acid salt to kill them.
This keeps it safe for the plant but weakens the bugs hold on the plant. Neem Oil is also an option but will leave a strong unpleasant smell after use. If you decide to use oil, be sure not to put any directly onto your buds because it will leave a residue and you do not want to smoke that, as it contains ingredients also harmful to humans. The final option is bringing in predator insects that can benefit the marijuana plant while consuming the harmful ones. You can use either other species of aphids with the drawback of a fast reproduction rate, or ladybugs which are predators of these insects.
Barnacles
If you are wondering to yourself, “what are these little white bugs on my weed plants?” Then chances are, you are more than likely dealing with Barnacles. These insects can be found under leaves and along the stalks of a marijuana plant. They slowly draw out the nutrients of the plant which can weaken and even kill it if not dealt with. Some barnacles are equipped with a camouflage feature making them appear as growth while others look more like a beetle with a similar shape to that of a potato bug.
Treatment: Treatment for barnacles is essentially the same as you would treat aphids, by washing off with a power washer. Unfortunately, the majority of barnacles will not be eaten by beneficial predator species. Remove as many of the bugs as you can by using a handheld pressure washer filled with room temperature water, or by running under the tap in a kitchen sink. Fatty acid insecticides are also efficient at wiping out well-established populations as is Neem Oil, but remember oil is unsafe for human or pet consumption.
Broad and Russet Mites
Mites are nearly impossible to spot with the naked eye due to their size. Generally, when an infestation occurs, it isn’t apparent until the plant has already begun to weaken. Mite infestations present themselves with symptoms such as droopy, yellowed, or hole filled leaves.
Treatment: Mites can be one of the most difficult pests to treat and will require due diligence in a steady flow of treatments to eradicate them fully. Insecticides rarely work for mites, but what is effective is Neem Oil. Regular 3 times a day, treatments of Neem oil will be required for 1-2 weeks depending on how many you have.
Fungus Gnats
Fungus gnats are cannabis soil pests that resemble tiny odd-shaped fruit flies that can often be observed hovering over top of growing marijuana plants. Their eggs are hatched in moist soil and can be an issue if the dirt in your plants was never thoroughly allowed to dry.
Treatment: While it may sound odd, using a hairdryer to dry out the soil in pots is a great first step. This will make it so they will no longer be able to reproduce. A fungus Gnats lifespan is incredibly short. After a few days, you should see a dramatic decrease in numbers. If that isn’t enough, then the other option is first based treatments like Neem Oil or diatomaceous earth which will kill the adult bugs on contact.
Leaf Miners

This weed bug lives inside of the plant material of a plant and is not a bug so much as it is the larva of several potential species that lay eggs inside of the leaves of a cannabis plant. The cannabis pests themselves are not visible by regular observation. Instead, look for white or yellow lines appearing on the leaves. They will appear messy, and jagged, and a very different color than the leaves themselves.
Treatment: Begin by removing all affected leaves. Since they are contained within the leaves, this will get rid of most of them almost immediately. Your next step should be an organic insecticide like Spinosad that will kill Leaf Miners when ingested and through contact.
Mealybugs
Mealybugs are kind of creepy looking, appearing bright white and hairy to the naked eye. These cannabis pests can be found long after the growing stage and can even be spread while a plant is drying.
Treatment: Begin by removing as many as possible by hand and with water pressure. They won’t bite, so you don’t have to worry about touching them. Follow washing with a treatment of alcohol, using 9 parts water and 1-part alcohol mixing in a misting bottle and spray all plants down 3 times daily until they are eradicated.
Spider Mites
This weed bug is a member of the spider family and is one of the most common among indoor cannabis pests. They are tiny and are generally noticed by either the bite marks left in plants or the numerous piles of webs they use to reach and eat the leaves of a marijuana plant.
Treatment: Some growers have had success using multiple insecticides, or pesticide oils to kill them. However, the biggest problem with spider mites is they will adapt to withstand anything you use to try and kill them. To rid yourself of a spider mite infestation will likely require 3-6 days of plant washes, whereas much of the web is removed as possible. This does not instantly kill them, but without webbing, they will have no access to the leaves, so they will slowly die of starvation.
Thrips
These cannabis pests look more like a long, tiny grasshopper and can appear black, brown, or yellow. The damage this weed bug will do is long term. They will ingest any accessible nutrients from any part of the plants they can, with leaves being the most heavily targeted.
Treatment: While you may have some success with insecticides due to this bug’s size and fast harmful nature, it is best to use a Pyrethrins treatment which is not only the most effective but is also safe for humans and animals. This treatment should take 2 or 3 days before you see the thrips disappear entirely.
How to tell if you have an ant infestation
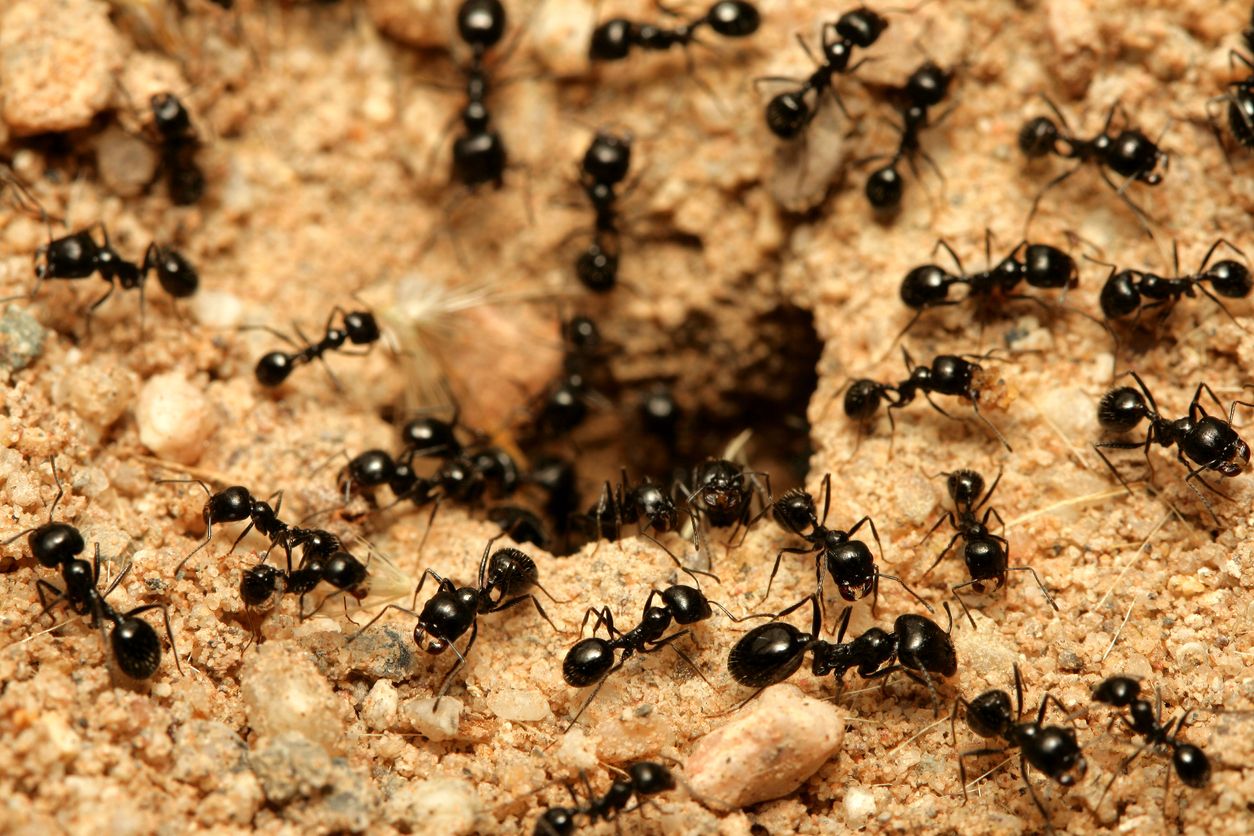
Ants are a natural part of being outdoors and are actually quite good soil aerators in nature, so you don’t want to kill them if they aren’t causing any real issues. Here are a few tips and tricks to assess the severity of an ant problem.
1. The number of ants
Occasionally, there will all be an ant in any garden if you look hard enough, but a noticeable presence on the plant itself, the leaves, or swarming of the soil surrounding a marijuana plant, are never a good sign.
2. Dirt mounds around plants
Once a colony has gotten well established, it will have formed several different routes of escape from their underground tunnel system. If you notice any raised soil piles with a small hole in the center of your garden, then you likely have an ant problem.
3. Droopy or deficient marijuana plants
Though technically, this symptom is one that could be experienced with any type of deficiency that might have numerous causes aside from pests. Once the soil has been too disturbed around the roots of your marijuana plant, this will be one of the first things that will be visually noticeable aside from a higher than usual ant presence.
4. Dense aphid population
Did you know that most ants love to feast on the innards of aphids? These small parasites will eat the leaves from a marijuana plant and convert it into sweet sugars that are thoroughly enjoyed by ants. Though the ants may be doing you a small favor by killing the aphids, the presence of delectable pests provides the perfect environment for ants to thrive, hence, quite often, you won’t find one without the other far behind.
How to get rid of ants in an organic cannabis garden
Even if you aren’t growing marijuana that is 100% organic, it is always a good idea to steer clear of anything that is chemical-laden as you will eventually be ingesting the plant which will hold onto a little bit of just about everything it comes into contact with. Here are 10 great options for naturally eradicating ants from your marijuana plants.
1. Diatomaceous earth
This powder is made of old fossils, so the edges are incredibly sharp. Though to the human eye, it merely looks like a soft powdery substance, on a microscopic level, these razor edges shards are quite scary, and is harmful to humans when inhaled. However, there are food grade diatomaceous earth products that won’t fly like dust in the air and are entirely safe for humans and animals, and the best part is, they do the same job. Sprinkle a thin layer of diatomaceous earth over the soil approximately 1 foot around your marijuana plant, as the ants crawl across it, it will scrape away at their exoskeletons, and eventually kill them.
2. Cayenne
This burning hot spice is perfect for keeping ants away and is really easy to use. Add 1 teaspoon to a mist bottle full of water and spray the marijuana plants and surrounding soil areas or sprinkle it around the base of the stem for a robust layer of protection. It will kill any ants that try to cross and work as a deterrent for any other interested wanderers.
3. Neem oil
Neem oil can help to get rid of all kinds of organic cannabis plant issues, but it is especially helpful when used to kill ants. Simply follow the measurements on the bottle and apply that mixture to your marijuana plant leaves using a spray bottle. It’s also a good idea to add a small amount to the surrounding soil, but do not thoroughly saturate, as we don’t want the oil to come into direct contact with the roots.
4. Treat other parasites
Since other smaller pests like aphids, mealybugs, and whiteflies are a significant food source for many ant species, eradicating these more minor issues can help to reduce the number of ants in your garden. This can often be done with a neem oil treatment or a mist with a spray bottle that is filled with 2 teaspoons of dish soap and warm water.
5. Beneficial insects
Ladybugs are one of the most economical and all-natural ways of managing an organic cannabis garden, and they are especially useful against ants. Ants will only colonize where there is food, and if hungry ladybugs are hanging around, then there won’t be any extra aphids and other pests to feast on. This can work as both a treatment and preventive measure, though it might be challenging to maintain for an entire season outdoors.
6. Cornmeal
If you do decide to go this route, you might initially notice an increase in ant presence, so if you are looking for a fast-acting solution, then this one might not be for you. However, if you are only experiencing a minor ant issue, then you might have the time to spare. Cornmeal works by attracting the ants, which will eat it and take it back to the colony. Since they cannot digest it, this will slowly kill them, so in 4-8 days after spreading some around your plants, there should be a decrease in numbers.
7. PH soil tester
Knowing the PH of your organic cannabis garden isn’t going to diagnose or even treat anything. However, providing a marijuana plant with the ideal environment can help to ensure that it is durable and resilient if and/or when it is ever faced with a challenging pest infestation. Buy a PH soil testing kit, and learn how to use it long before growing marijuana whenever possible.
8. Cinnamon
Cinnamon has been a go-to, all-natural solution for eradicating ants and keeping them outside of homes for years. Though there are several powder options on this list, cinnamon is often the most effective long-term. Sprinkle some around each marijuana or add 2-3 tablespoons of cinnamon to approximately 1 cup of cold water and mix them together for a potent ant killer. This solution is gentle enough that it can be dumped onto the soil where the roots are, and not cause any harm to the plant itself.
9. Bucket of water (for potted marijuana plants)
This option only works for cannabis plants that have been potted and merely placed outside to grow. Sometimes, a garden plot gets so badly overrun, that your fastest option might just be to dig up your plants and throw them into pots. Either way, immersing the entire pot of soil for 24 hours in lukewarm water is an instant way to kill ants that are on your marijuana plants.
10. Borax and sugar
Making an ant bait poison is easy, but this mixture should not be placed anywhere that children or pets might have access. Reason being, it is sweet, and though borax is a naturally derived product, it is toxic. Begin by adding a ratio of 6 to1 of borax and sugar to a mixing bowl.
Now, stir the ingredients together until they form a chunky paste-like texture. Scoop out small portions of the ant bait, and place it all around the garden, and right up to the base of the marijuana plant. Unfortunately, you will probably see a slight increase in ants, as they swarm the sweet and gooey mixture, but within a few days, the number will drop dramatically. Borax works, as it is taken back to the colony and fed to the other ants, which kills them within hours of eating it.
Common diseases & fungus
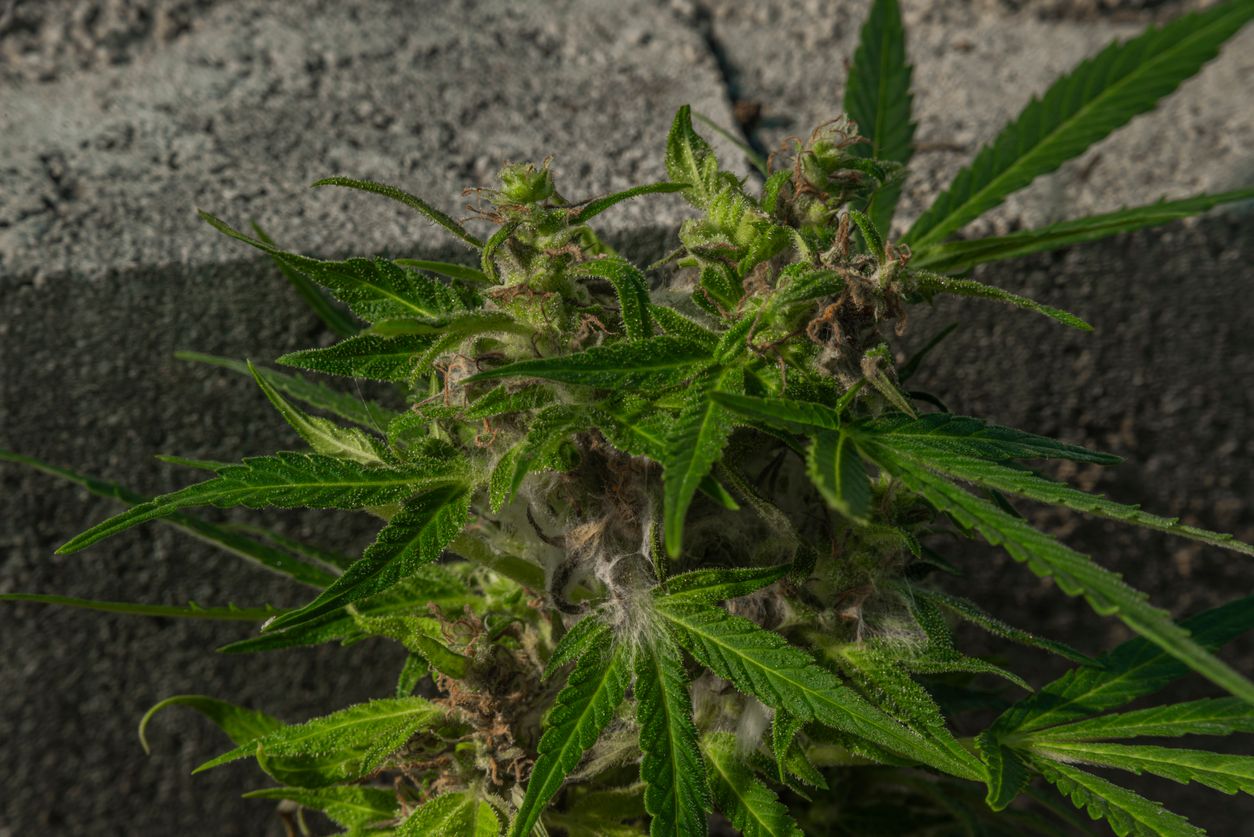
1. White powdery mildew
Once you notice these dust-like specs on a cannabis plant, it is essential to take immediate action, but the only problem is that the treatment can be almost as damaging to the taste and quality of the bud as the mold, and there is no guarantee that your yield won’t be contaminated. So, if you can afford to, we highly recommend removing this plant from your grow room or garden to prevent it from spreading.
2. Bud rot
Bud rot is rarely caught early, as the warning signs are typically a dried out plant that looks to be in need of water, and since it forms in the latest portion of the flowering stage, once it’s visible to the eye, the plant product is contaminated. Most growers will immediately destroy a plant with bud rot, as it can spread through an entire crop, but if you want to try to save your cannabis, then you can try to salvage what’s left with a soil transplant, and trimming away the infected buds.
3. Pythium rot
This one is a disease that comes straight out of the seed, and it results in seemingly healthy seedlings suddenly dampening off. It then goes into self-destruct mode as it wilts and dies, and there is nothing that you can do to come back from it. The best course of action is simply tossing the infected seedling so that it doesn’t adversely impact the others.
Cannabis Root Rot
Many outwardly displayed marijuana plant problems start at the base of the plant. When the roots are affected, stressed, or broken it can cause a whole lot of damage, and this typically happens after watering a plant far too much in high humidity climates. The most common symptom is droopy leaves, wet soil, and a yellowing that is impossible to ignore, and the only way to fix it is through repairing the moisture levels in the soil. In some cases, that can be as easy as placing the plant in direct sunlight to dry up everything, which will help to kill bacteria, but in others, a full transplant with fresh nutrient-rich soil is the only thing that can give the plant a fighting chance.
Fixing broken or damaged cannabis plants
It happens to the best of us when growing marijuana. A plant gets brushed the wrong way or falls somehow, and your cannabis plant suddenly looks defeated and severely damaged. Luckily, there is still hope for reviving all your hard work with a few handy tips and tricks for treating wounded plants. That doesn’t mean that any plant can be restored, as with some damage, there is just no coming back from, but it will give you a better shot at nursing your marijuana plant back to a thriving condition. It’s important to remember that cannabis is an incredibly durable species that doesn’t go down without a fight.
How to fix a marijuana plant with a detached or broken stem
Broken stems can be fatal to a plant if left untreated and are most often caused by rough movements or training during the flowering period. Detached stems are most often from the plant being dropped or jostled too much and are an immediate death sentence if not tended to as soon as possible. Fixing a detached or broken cannabis plant stem is entirely possible with just a handful of tools and a little patience.
Tools
- 1 roll of plant repair tape, electrical tape, or duct tape
- 1 toothpick or small stick
Instructions
-
If the stem on your marijuana plant is broken, you will need to push the tips together to allow the plant the ability to fuse itself back together.
-
Place your stick or toothpick as a shunt that will hold the stem straight and add strength.
-
While you hold it pressed against the stem, wrap it using the tape to keep it in place. Remember to keep the tape tightly wound as the pressure will help with healing.
-
Once you feel confident in the strength of the repair, you can cut the tape and check its stability.
-
Let the plant heal while wrapped for 2 full weeks. Now you can check on the healing of the plant. If it has a lot of damage, including a complete stem detachment, then the tape may need to remain on the plant for 4 or 5 weeks before it can be safely removed.
How to fix a marijuana plant with a split stem
Split stems can be difficult to heal if they aren’t noticed in less than 24 hours after they occur. Within a mere 3 hours, a marijuana plant stem will already begin to die off from the inside, making fusion much less likely. Luckily there isn’t much that is needed in this case. The biggest problem going forward for some growers will be that the tape should never be removed and will likely remain for the entirety of the plant’s life.
Tools
- 1 water mister bottle
- 1 roll of tape (electrical, duct, or plant badge)
- 2 cotton swabs
Instructions
-
Give the plant a heavy spray focusing on the incision on the stem. The goal is to get some of the water to soften the inner stem material to make fusion more likely.
-
Once you have sprayed your cannabis plant, take a cotton swab and dry the outer areas surrounding the split. This step is necessary, or the tape may not stick well enough to hold.
-
Now, cut a section of tape to wrap the stem several times and begin just before one end of the split and work your way towards the other, winding the tape as tightly as you can.
-
Split stem bandages are often permanent, as removing them too early can cause more damage than it’s worth. If you don’t want that to happen, then you should wait at least 4 weeks before attempting to remove the tape.
How to fix a marijuana plant with a bent stem
Bent stems are generally located higher up on a plant and tend to require a more substantial support system to keep it raised. While at first, a bent stem may not seem too bad of a prognosis, if the plant is particularly young or if it holds a forming cola above the bend, that portion could die off from a lack of nutrients flowing to the leaves. To fix a bent marijuana plant stem, you will need to find a supportive structure that reaches high enough to rest its weight on while aligning well with the stem itself.
Tools
- 1 roll of tape (electrical, plant, or duct tape)
- 1 supporting structure
Instructions
-
Stand the supportive structure beside the plant and press it into the dirt to hold it in place.
-
Wrap several rounds of tape around the stem and the support to keep both stable and strong.
-
Leave the bandage for 2 full weeks before removing the tape. A bend will heal within that time and should be able to support itself once again.
How to heal a marijuana leaf
Unfortunately, there is no simple treatment for repairing damaged cannabis plant leaves. The most common reason for marijuana leaf lesions is nutrient deficiencies, so usually, the only way to truly fix a problem associated with the leaves is to heal them from the inside using a rigorous nutrient schedule.